- Knowledge Base
- Projects
- Boards
- Custom filters
- How to add a run
- How to edit a run
- How to mark a run as complete
- How to archive a run
- How to delete a run
- How to change the assignee
- How to add a result in a checklist run
- How to add bulk results in a checklist run
- How to share run tasks with external participants
- How to generate an Excel or PDF report from a checklist run
- How to filter the run tasks view
- What is an office asset
- How to create a new asset
- How to manage an asset
- How to move an asset
- How to dispose of an asset
- How to transfer (in) an asset
- How to transfer (out) an asset
- How to log a sighting of an asset
- How to log an inspection of an asset
- How to log maintenance on an asset
- How to export a record of an asset
- How to print asset labels
- Introduction
- Admissions
- Assets
- Bank Accounts
- Boards
- Business Trips
- Candidates
- Checklists
- Clients
- Companies
- Consents
- Contacts
- Contracts
- Custom Forms
- Departments
- Documents
- Evaluations
- Employee Performance
- GL Accounts
- Incoming Center
- Integrations/External Systems
- Invoices
- Job Management
- Key Dates
- Months
- Offices
- Personnel
- Polls
- Project Management
- Project Status
- Purchase Orders
- Schedule
- Shared Spaces
- Teams
- Time Off
- Time Tracking
- Transactions
- Vendors
- Mobile Application
- What is a personnel asset
- How to create a new asset
- How to manage an asset
- How to move an asset
- How to log inspection on an asset
- How to log maintenance on an asset
- How to dispose of an asset
- How to transfer (out) an asset
- How to transfer (in) an asset
- How to log a sighting on an asset
- How to print asset labels
- How to export a record of an asset
- What is a project asset
- How to create a new asset
- How to manage an asset
- How to move an asset
- How to log inspection on an asset
- How to log maintenance on an asset
- How to dispose of an asset
- How to transfer (out) an asset
- How to transfer (in) an asset
- How to log a sighting of an asset
- How to print asset labels
- How to export a record of an asset
- Project transactions
- How to record an estimate
- How to create a budget
- How to submit transaction items for approval
- How to approve or deny budgeting items from the transactions grid
- How to create a purchase order from approved estimates
- How to link approved estimates to approved budgets
- How to cancel a transaction
- How to deactivate a transaction
- How to edit a transaction
- How to re-submit a denied transaction
Custom filters
What are custom filters
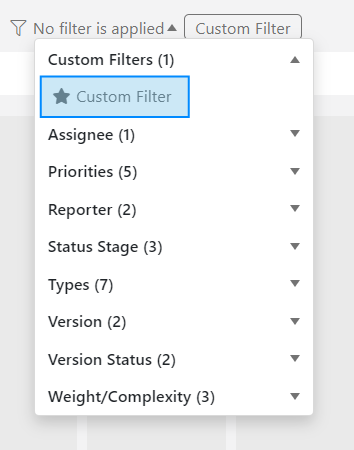
This functionality allows you to create and save your own filter settings. Choose one or more filter elements from the dropdown menu and click the save  icon next to the filter tab. You will be able to give your filter a name which will appear next to a star icon under Custom Filters in the filter dropdown menu. If you decide you want to change your preferences, you can edit or delete the custom filter by following the steps below.
How to create a new custom filter
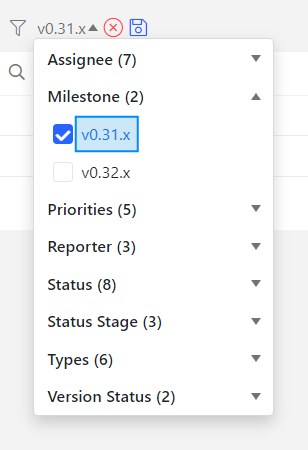
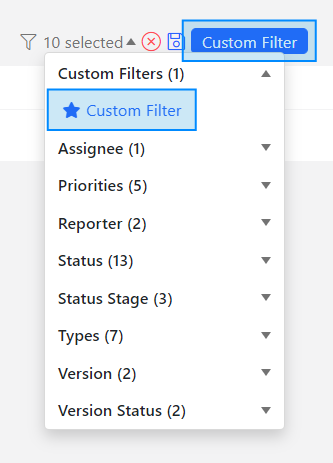
To create a new custom filter, go to the Projects module and click the Kanban or Tasks tab inside of a specific board. Select the filter values by clicking on their names. Click anywhere outside of the filter dropdown menu to apply the selection.
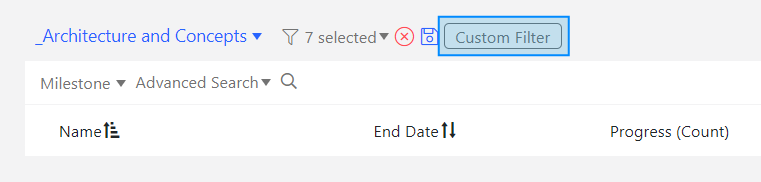
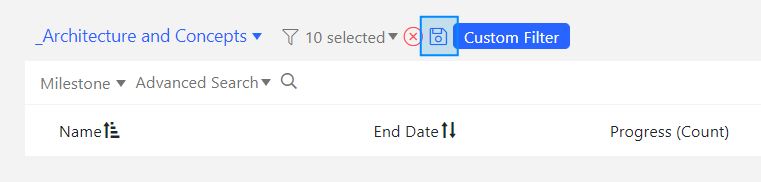
The selected filter values will be listed next to the filter icon.
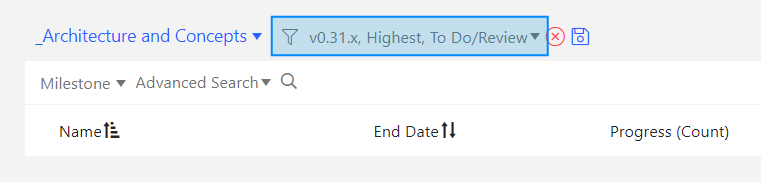
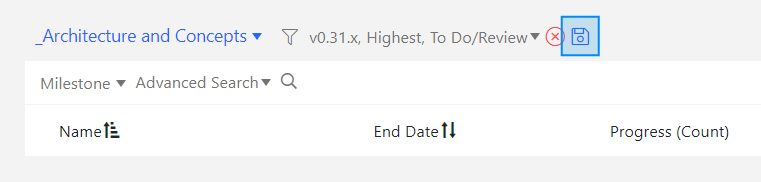
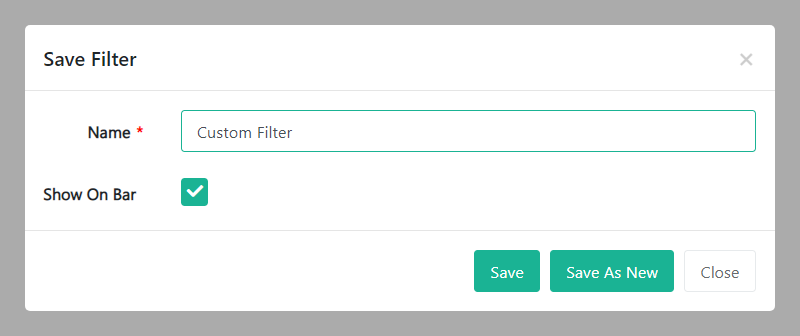
Click the Save  icon.
icon.
A Save Filter modal window pops up.
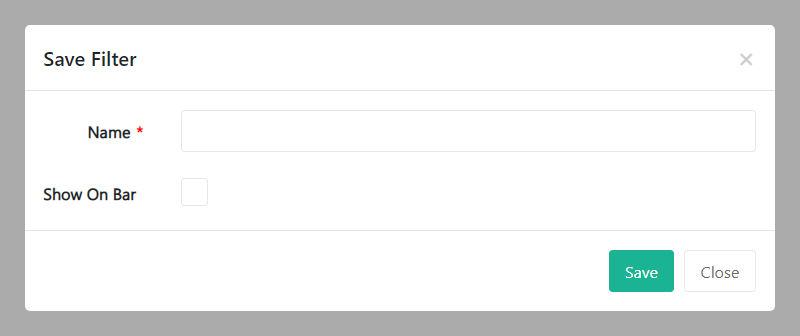
Tick the Show On Bar checkbox if you want to see it as a label/button next to the filter field.
If you don’t tick the Show On Bar checkbox, the filter will only be visible as a custom filter in the filters dropdown menu. If you want to set a custom filter as a default filter, click the star  icon.
icon.
How to edit the name of a custom filter
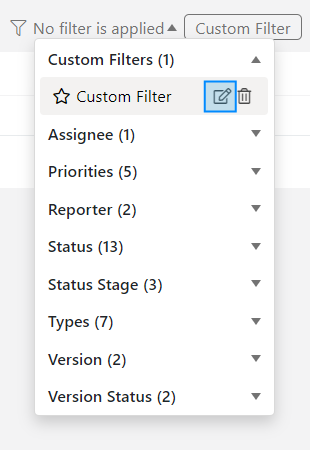
To edit the name of a custom filter, go to the Projects module and click the Kanban or Tasks tab inside of a specific board. Click the edit button next to the filter name inside of the filter dropdown menu.
An Edit Filter modal window pops up.
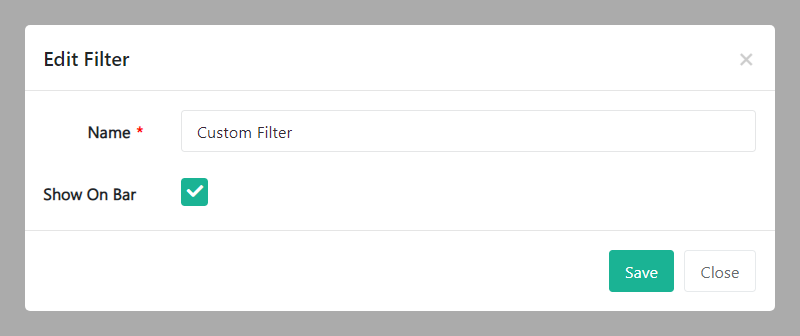
Update the relevant information and click Save.
How to edit filter values or create a new custom filter from an existing one
To edit filter values or create a new custom filter from an existing one, go to the Projects module and click the Kanban or Tasks tab inside of a specific board. Click on an existing custom filter name on the bar or in the dropdown menu. You can now add new or remove existing filter values.
Save your changes by clicking the Save  icon.
icon.
A Save Filter modal window pops up.
Click Save to update your changes or Save As New to create a new custom filter.
How to delete a custom filter
To delete a custom filter, go to the Projects module and click the Kanban or Tasks tab inside of a specific board. Click the delete button next to the filter name inside of the filter dropdown menu.
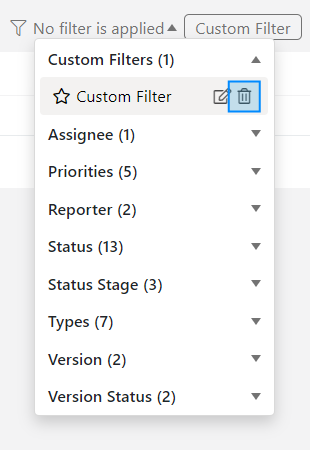
A Delete Filter modal window pops up.
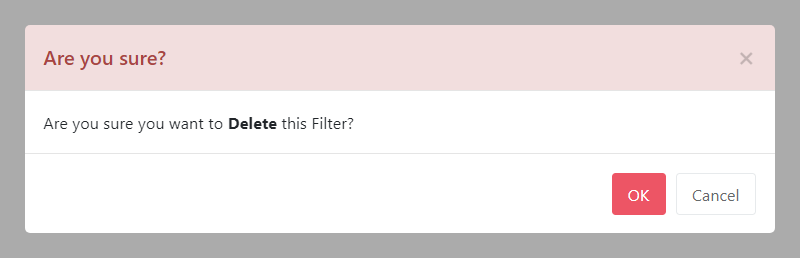
To minimize the risk of accidental deletion, you must confirm your intention to delete the custom filter. Click OK and the custom filter will be deleted.
Was this article helpful?
Didn’t find what you were looking for?
Contact us and we’ll build the right solution for you. Vault Synapse can be fully customized based on your business needs.