Project tasks
What are project tasks
Projects in Vault Synapse can be broken down into boards and tasks. A project task is a single unit of work within a multiple-step project which needs to be accomplished by a set deadline. Tasks show the various phases of a project. A large menu of task's components allows you to customize and configurate tasks based on your preferences. In addition, you can also group the Task view by Assignee, Priority, Status, Version, Type, and many more. Progress bars in the Tasks view will show you the complexity of tasks and their progress. With the Projects Module, you’ll get a complete overview of the project’s execution stages.
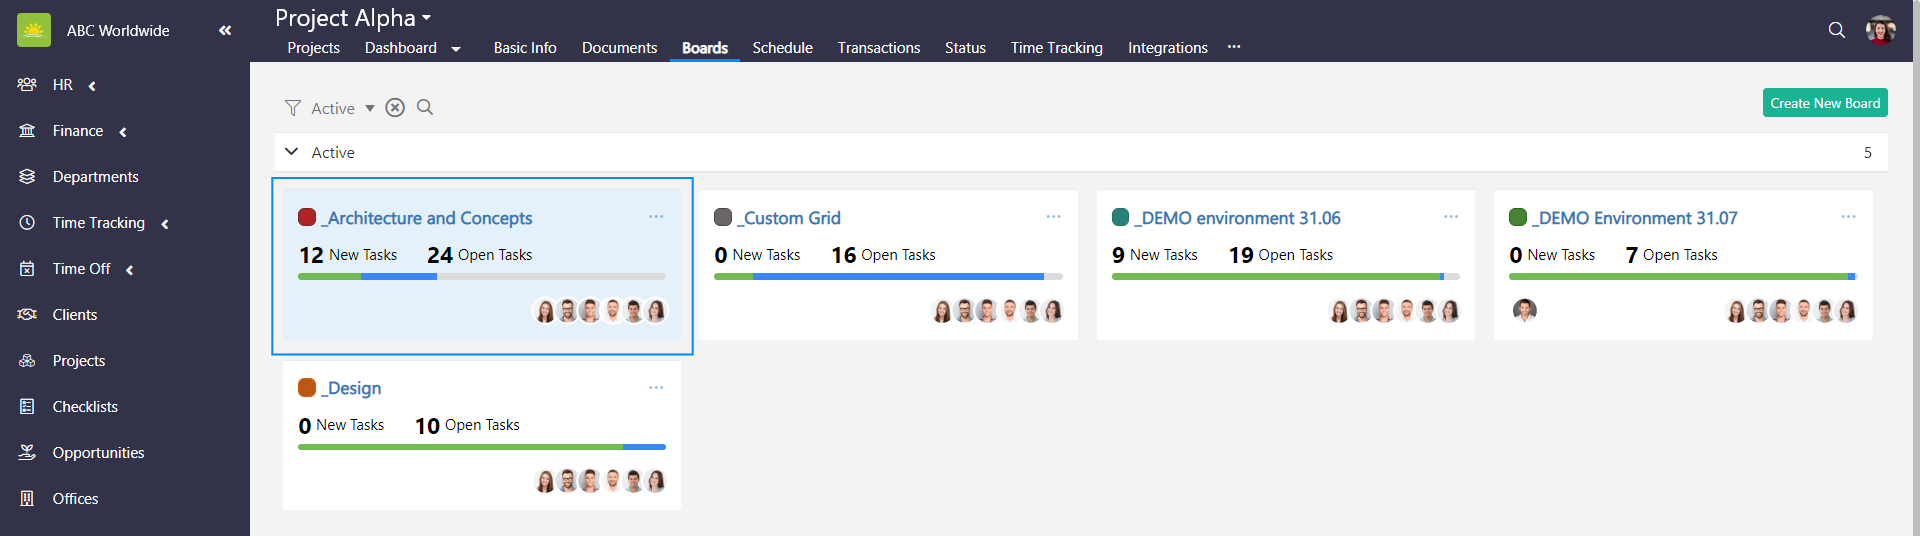
To see your project’s tasks, go to the Projects Module and click the Boards tab inside of a specific project.
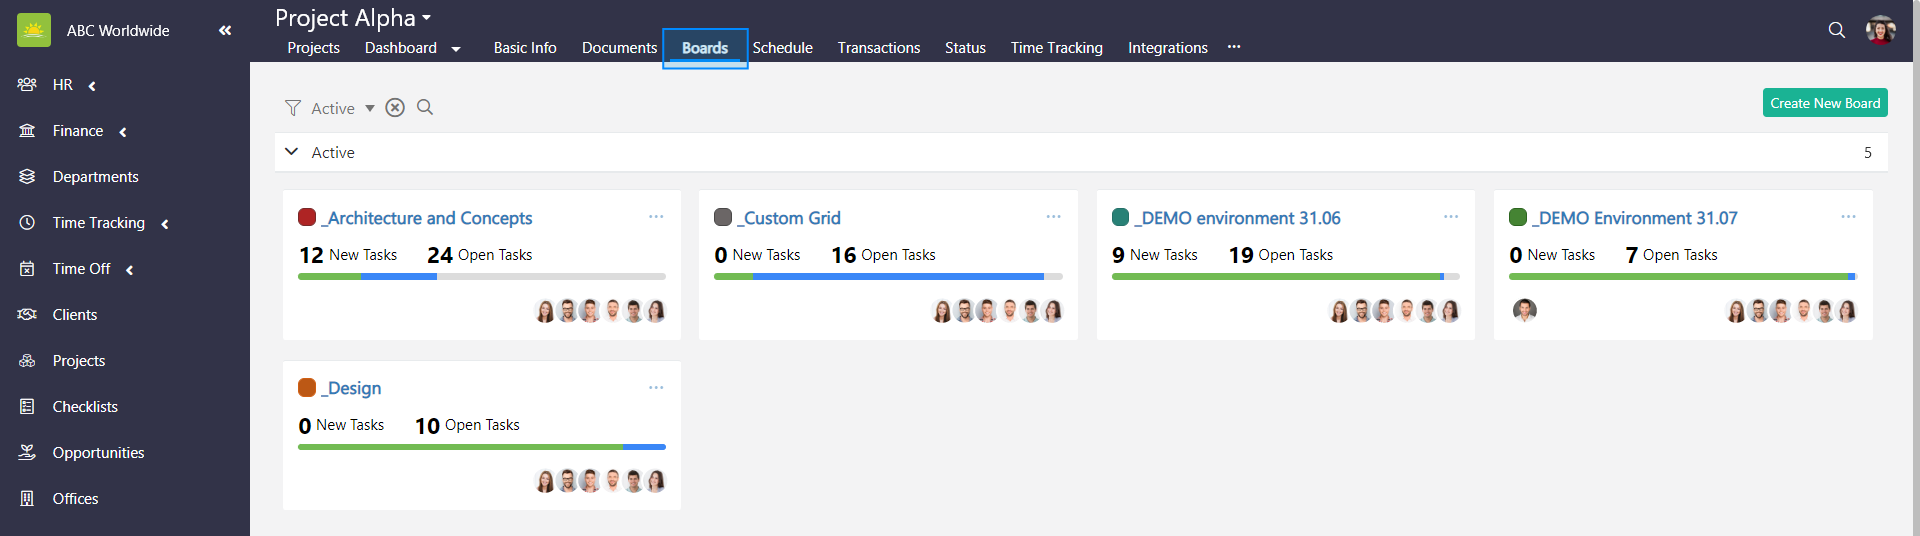
Click on the board that you want to view tasks for.

Tasks in the board can be visualized in a Kanban or Tasks view.
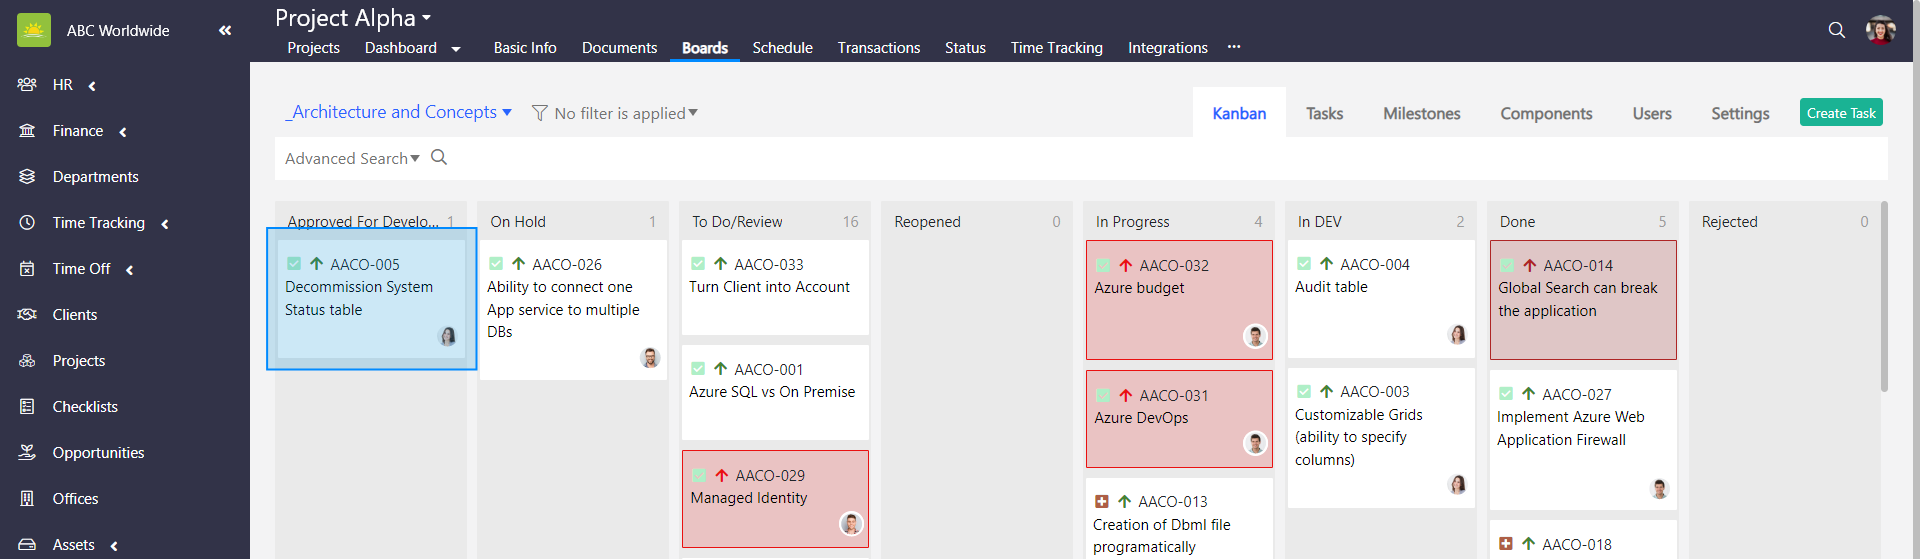
What is a Kanban view
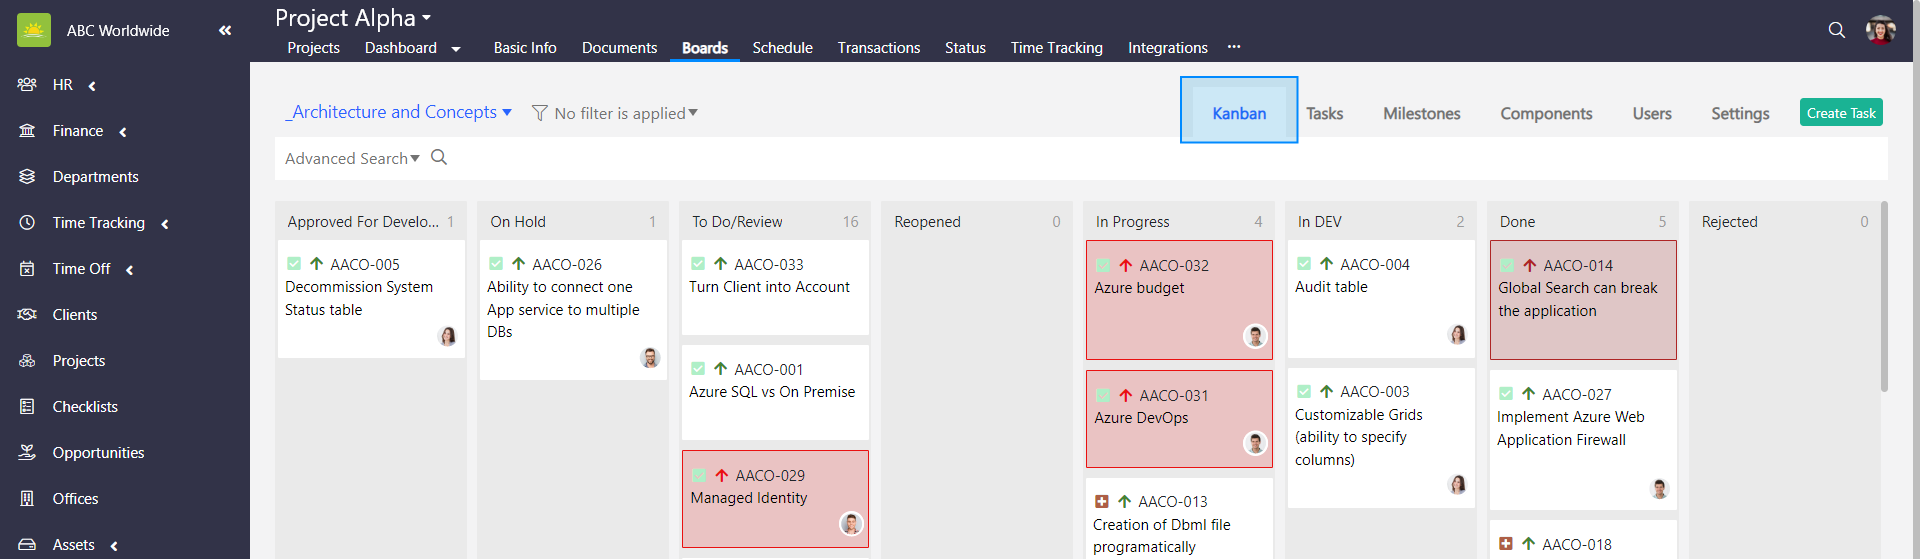
A Kanban view helps visualize work and maximize efficiency through managing work at a personal, organizational, and project level. Kanban boards represent work at different stages of a process and are visualized by columns. Cards in the columns represent tasks moving from left to right to show work progress. With Vault Synapse, you can create your own template and customize it so that it fits your workflow.
Go to the Projects Module and click the Boards tab inside of a specific project. Click the Kanban tab inside of a specific board and the Kanban view pops up.
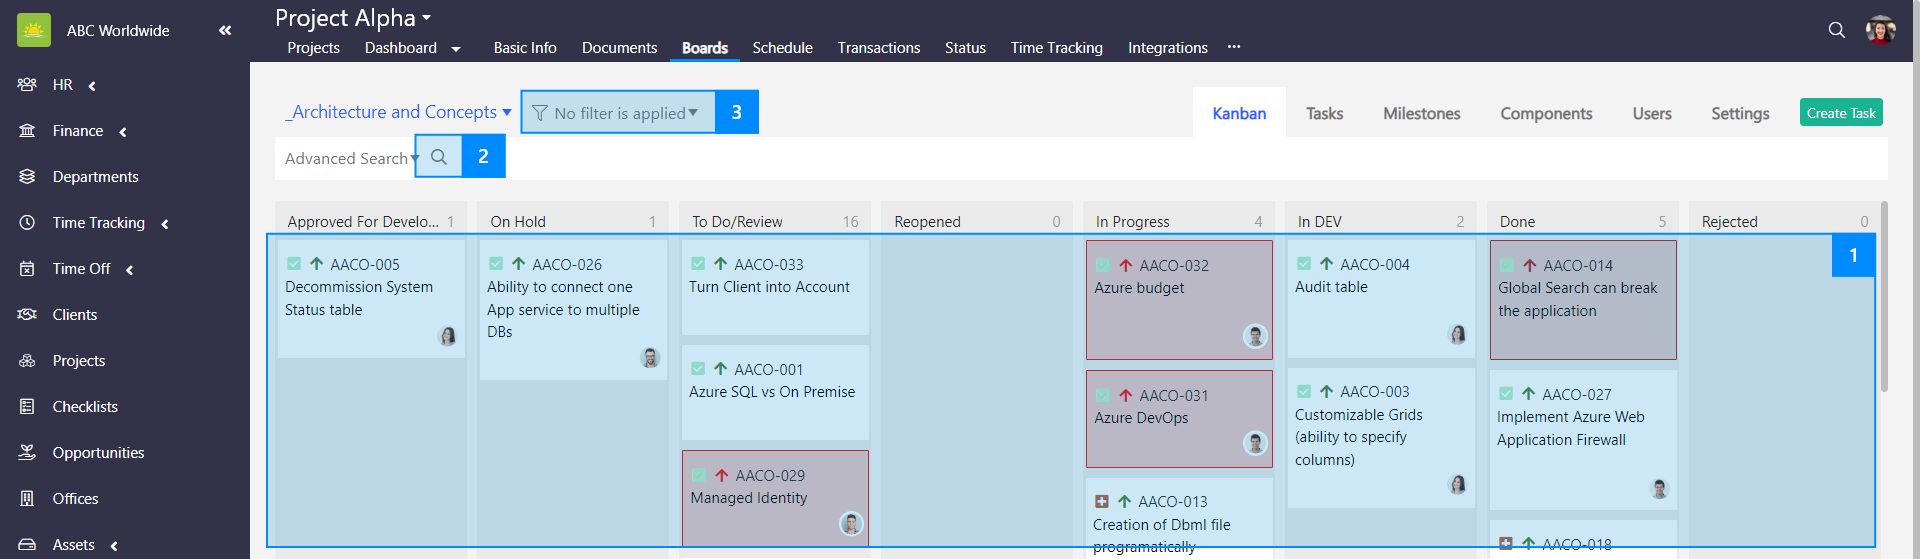
You can search for a task in 3 different ways:
- Manually – Select the relevant task from the board.
- By using keywords – Enter the name of the task or any keywords that the task contains to find your entry.
- By using filters – Use filters to help narrow down your search.
You can set up your own custom filters. Click the link to find out what custom filters are.
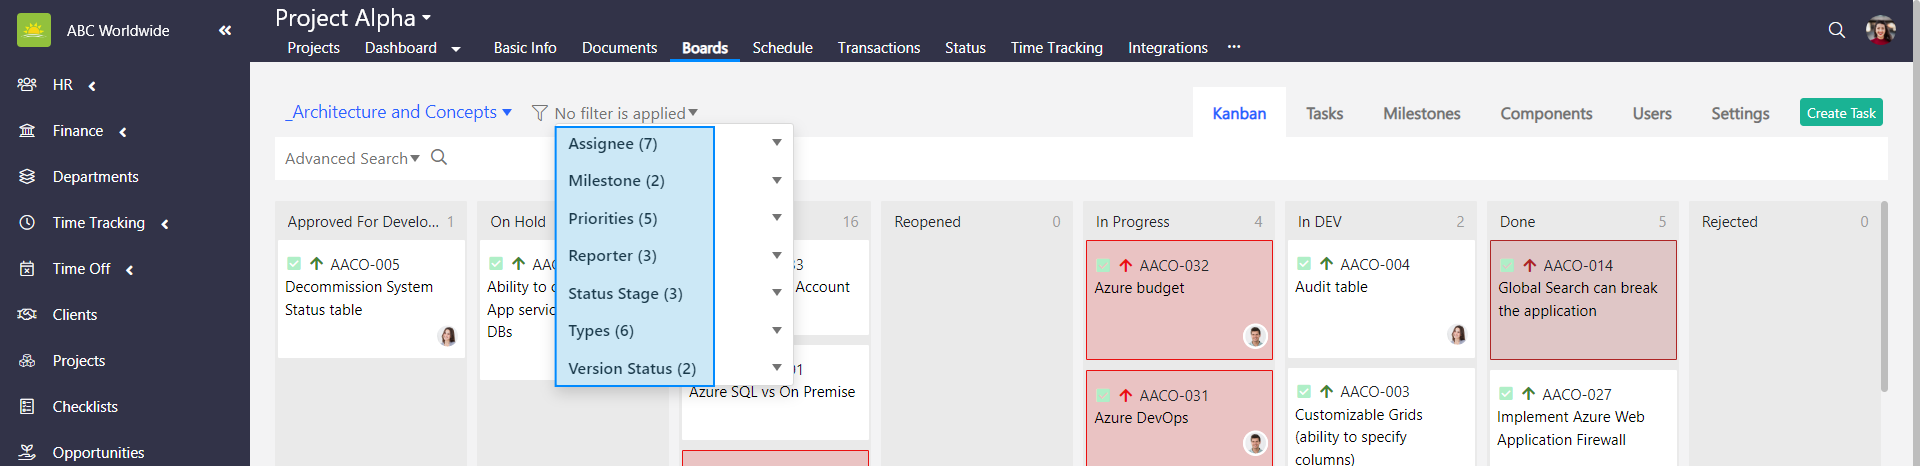
View all your board tasks in the way you want. The Grouping function will help you categorize tasks in a way that suits you. Tasks can be grouped by Assignee, Milestone, Priority, Reporter, Status, Status Stage, Version Status, and Type.
Clicking on a specific task will open the task card which you can then update.
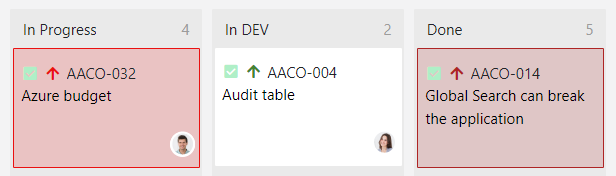
Highlighting high priority tasks
High priority tasks will be highlighted with a colour. By default, this is for tasks with a High priority level and the colour is red. This functionality can be turned on or off. If you want to know how to customize high priority tasks, click the link to find out how to customize and configure the general settings of a specific board.
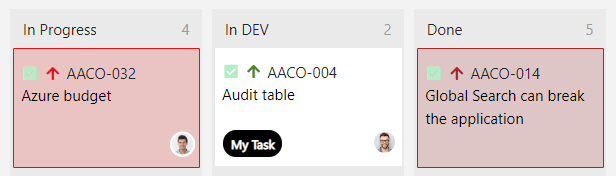
My Task
Tasks assigned to current users will be highlighted with a 'My Task' tag. This functionality can be turned on or off. If you want to know how to customize the 'My Task' tag, click the link to find out how to customize and configure the general settings of a specific board.
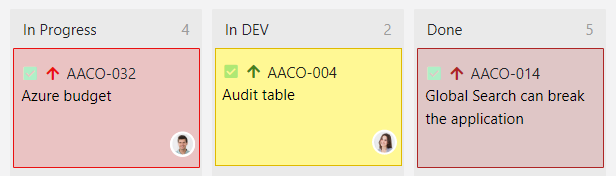
Custom ticket highlight
When creating a task, there might be a non-mandatory option color set up. If a color is set then the ticket will be this color in the Kanban view. If you want to know how to customize custom tickets highlight, click the link to find out how to customize and configure the general settings of a specific board.
Use the drag and drop feature to move the selected tasks to a different column in the Kanban view. You can only use the drag and drop feature to move cards between categories on the same board. Click the link to find out how to move a task.
Note! You can also move tasks using the Bulk Changes option.
What is a Tasks view
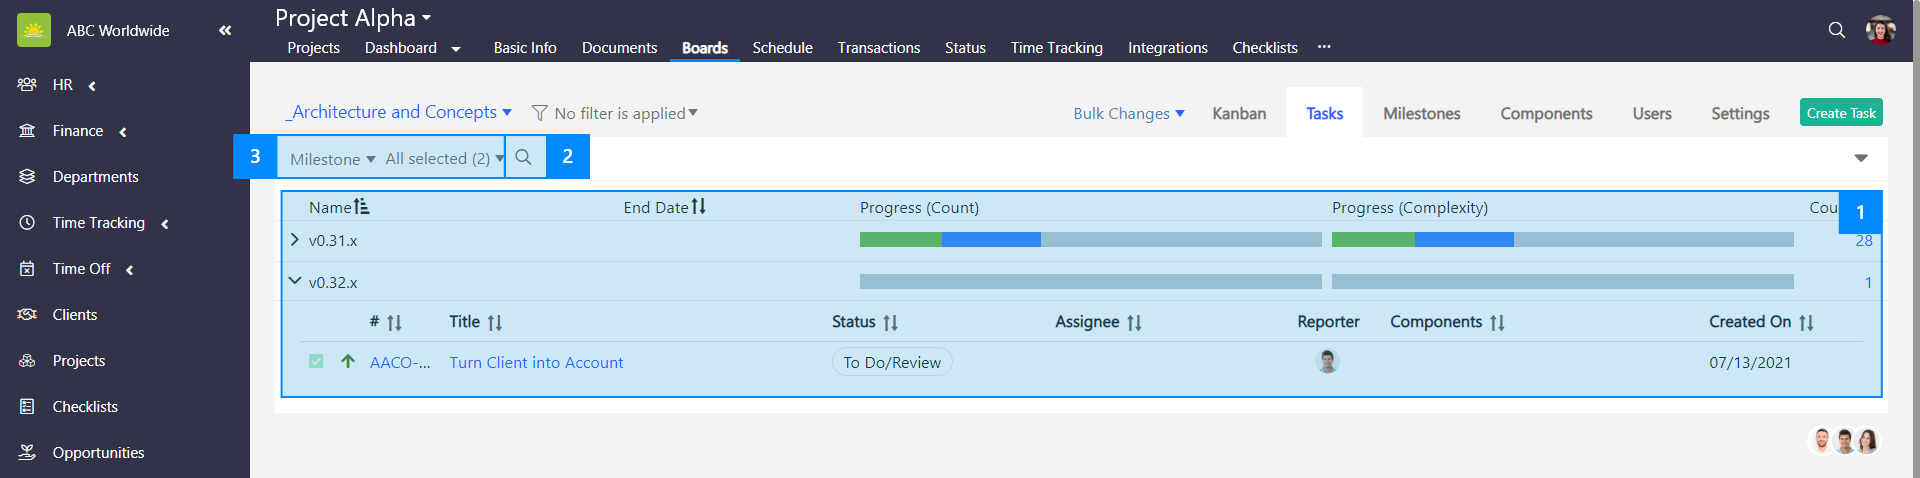
A Tasks view is an agile list of tasks viewed under milestones/versions grouping. This grouping is set up by default. Click on any name of a Milestone/Version to view all the linked tasks, their assignees, reporters, creation date, and components. Hover your mouse over the Progress (Count) bar to view the number of done (green), in progress (blue), and to-do tasks (grey). Hover your mouse over the Progress (Complexity) bar to view the status of done, in progress, and to-do tasks as a percentage. A filter consisting of multiple elements and an advanced search function enables you to further narrow down your search for a specific task. The Tasks view is very useful for project management as you can track, organize and prioritize work, monitor progress, update tasks and their status, and much more.
Go to the Projects Module and click the Boards tab inside of a specific project. Click the Tasks tab inside of a specific board and the Tasks view pops up.

You can search for a task in 3 different ways:
- Manually – Select the relevant task from the board or list.
- By using keywords – Enter the name of the task or any keywords that the task contains to find your entry.
- By using filters – Use filters to help narrow down your search.
You can set up your own custom filters. Click the link to find out what custom filters are.
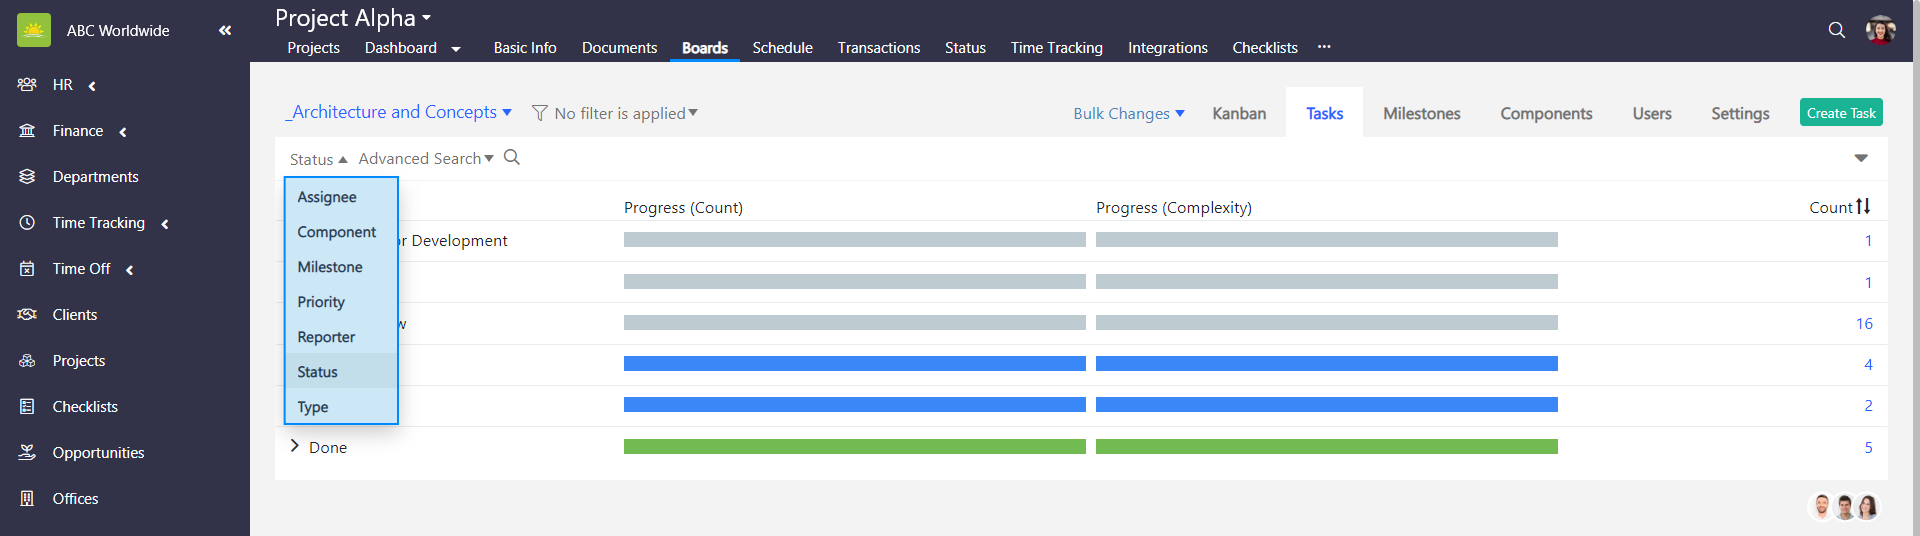
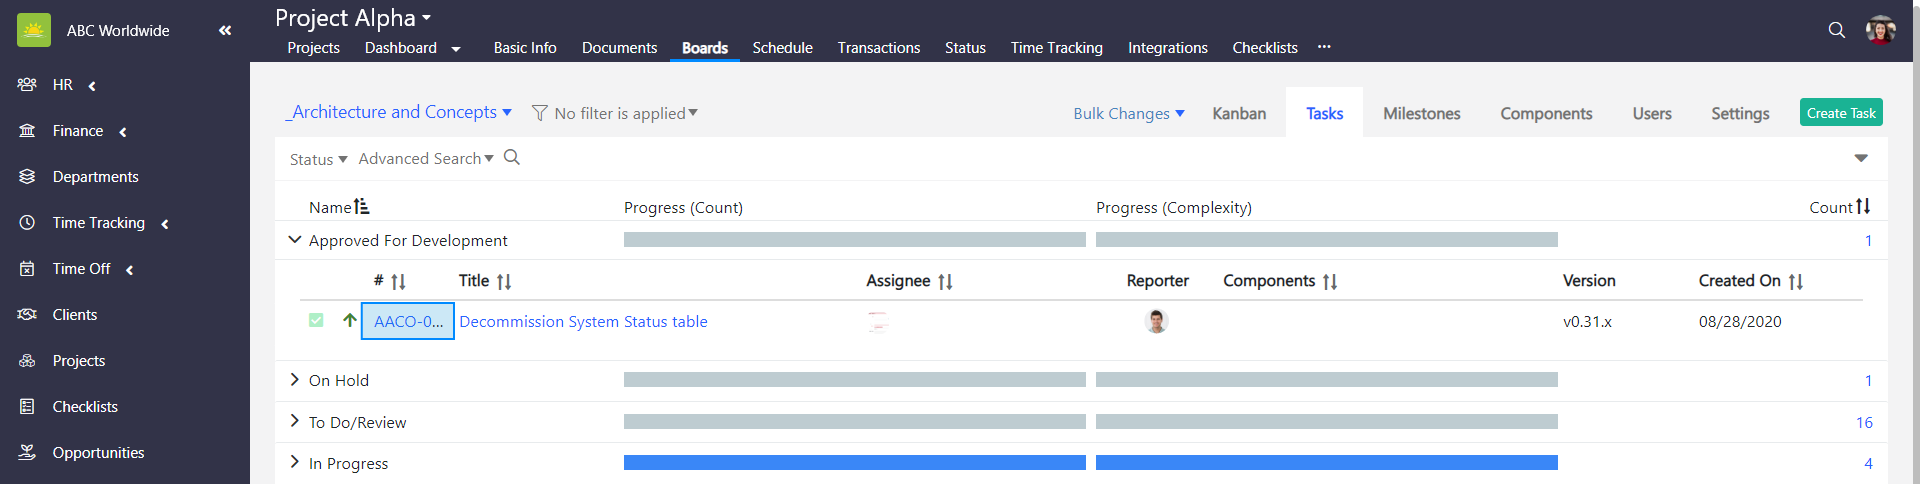
View all your board tasks in the way you want. The Grouping function will help you categorize tasks in a way that suits you. Tasks can be grouped by Assignee, Milestone, Priority, Reporter, Status, Status Stage, Version Status, and Type.
Clicking on the task number or title of the task will take you to a specific task which you can then update.
Use the drag and drop feature to move the selected tasks to a different category in the Tasks view. You can only use the drag and drop feature to move cards between categories on the same board. Click the link to find out how to move a task.
Note! You can also move tasks using the Bulk Changes option.
How to create a task
To create a task, go to the Projects Module and click the Boards tab inside of a specific project. Click on one of the boards.
Click Create Task in the top right corner.

A New Task modal window pops up.
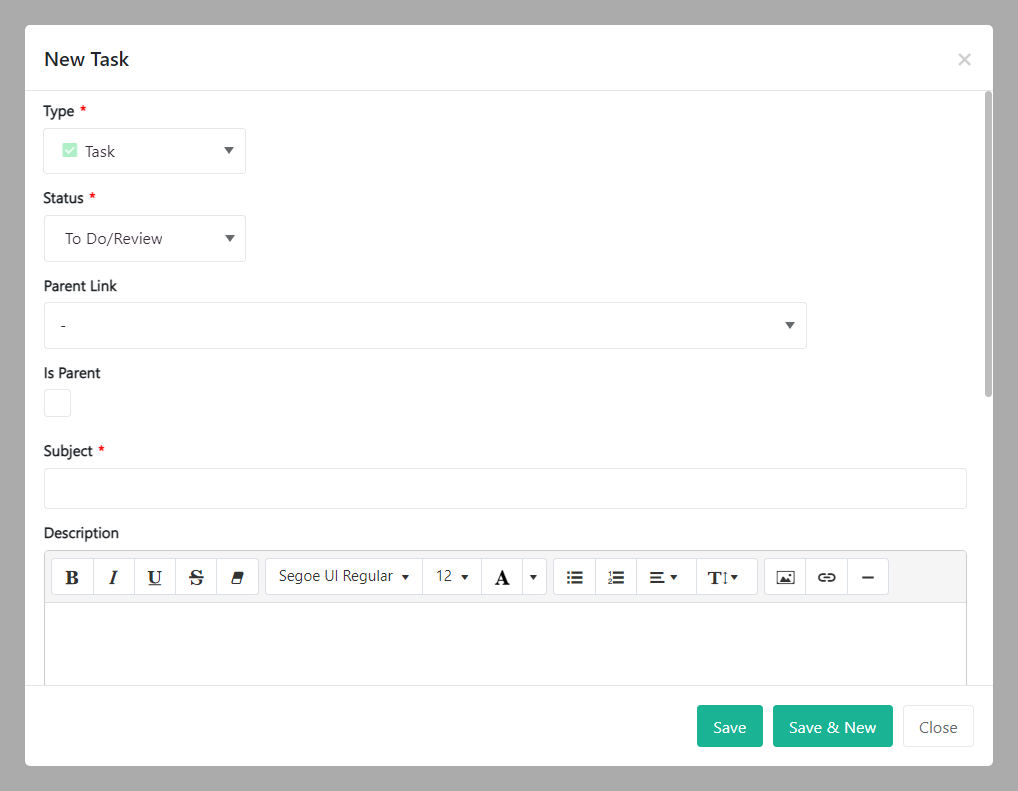
Fill out the fields about the new task:
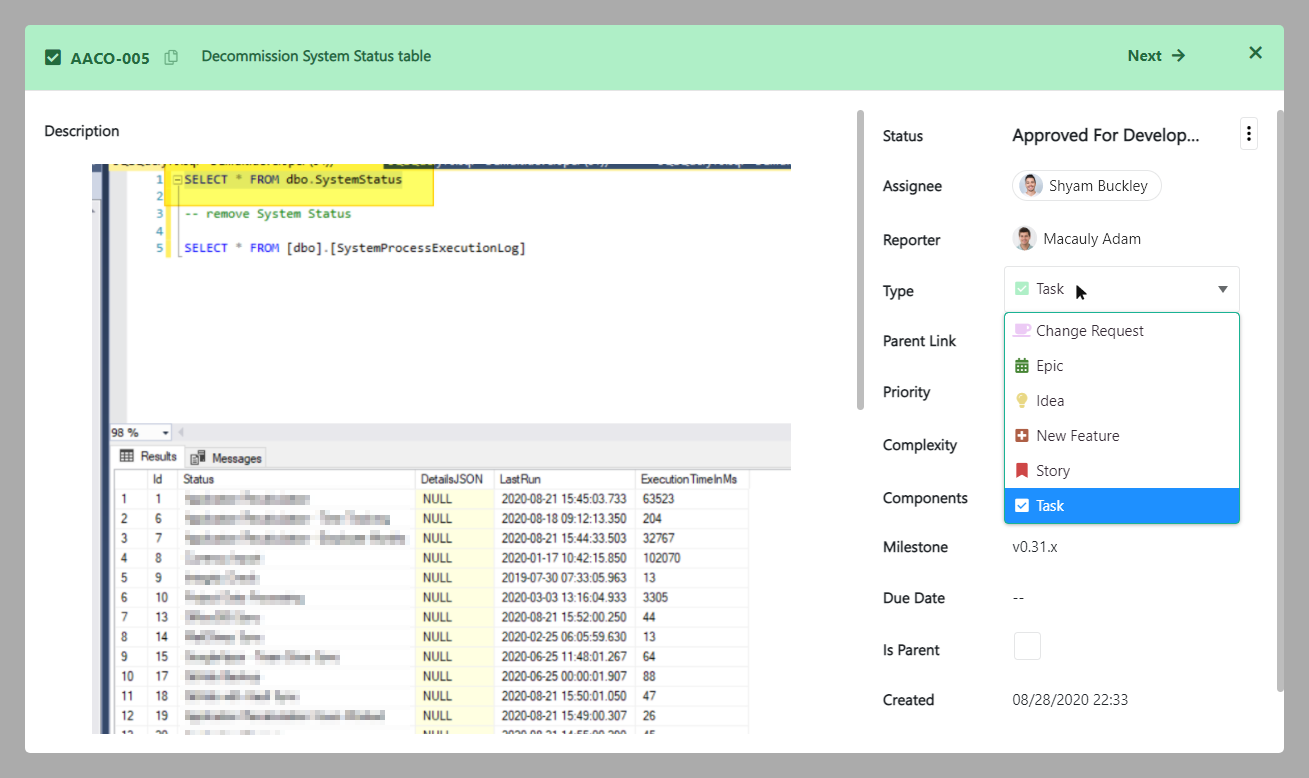
- Type – Select a ticket type from the dropdown menu. Ticket types can be defined in the Organization Configuration by an administrator.
- Status – Select a ticket status from the dropdown menu. Ticket statuses can be defined in the Organization Configuration by an administrator.
- Parent Link – If there’s an existing ticket on the board which you can connect to the one that you’re creating, this would be considered the parent ticket. Tickets became a parent once you tick the field is parent box. You can select the parent ticket from the dropdown menu to connect them.
- Is Parent – Tick this checkbox if the ticket you’re creating will be a parent to the child ticket(s).
- Subject – Enter the subject of a ticket. This would be a short, one line summary of the ticket.
- Description – You can add a more detailed description of the task here. You can be as descriptive as you wish. Attach pictures, text, and links if applicable.
- Components – Tag selected tasks and define how they’ll be grouped. Ticket components field can be configurated in the Organization Configuration by an administrator.
- Version – Grouped tasks can be organized by versions. Versions field can be configurated in the Organization Configuration by an administrator.
- Complexity – Select a complexity level from the dropdown menu. The complexity level can be configurated in the Organization Configuration by an administrator.
- Priority – Select a priority level from the dropdown menu. Priority levels field can be configurated in the Organization Configuration by an administrator.
- Due Date – Set up a due date for the ticket if applicable. The Due Date field can be configurated in the Organization Configuration by an administrator.
- Attachments – You can upload files here if the ticket requires documentation.
- Assignee – Assign the ticket to a member of the team. The Assignee field can be configurated in the Organization Configuration by an administrator.
- Reporter – This field is disabled and will be populated with information about the task creator. The Reporter field can be configurated in the Organization Configuration by an administrator.
- Color – Color is a non-mandatory option set up in the Organization Configuration by an administrator. If a color is set then the ticket will be this color in the Kanban view.
Click Save or Save & New if you want to create another task.
How to edit a task
To edit a task, go to the Projects Module and click the Boards tab inside of a specific project. Click on one of the boards.

Find the task you wish to edit and click on it inside the Kanban or Tasks view to open it.

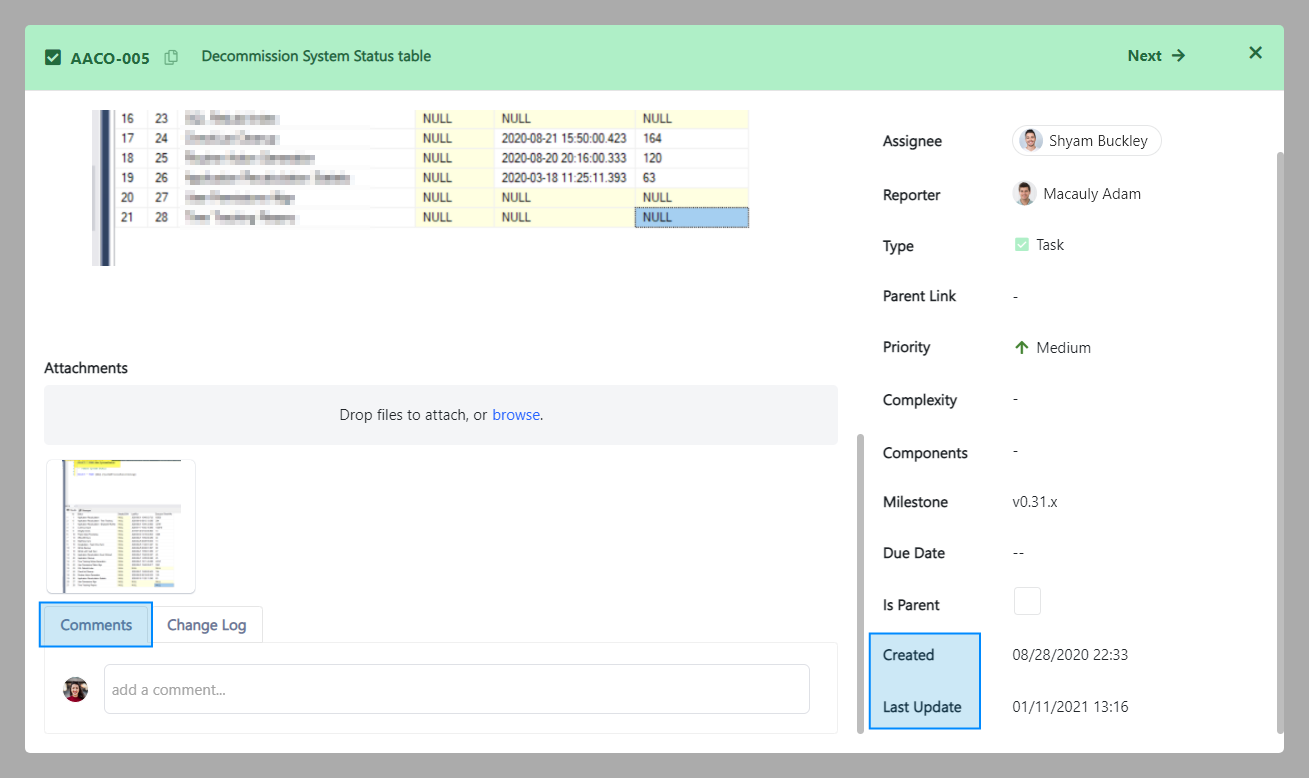
The task information is then displayed. To edit the information, click on a field on the right sidebar. This will turn the editable mode on.
Once you’ve finished editing, you can exit or move to another ticket without saving as the editing mode saves all changes automatically except for the Description. The Description has to be saved before you close the ticket. You will also notice additional functions such as Comments and the Change Log (e.g. when the ticket was created and last updated).
Note! You can also edit tasks using the Bulk Changes option.
How to delete a task
To delete a task, go to the Projects Module and click the Boards tab inside of a specific project. Click on one of the boards.

Find the task you wish to delete and click on it inside the Kanban or Tasks view to open it.

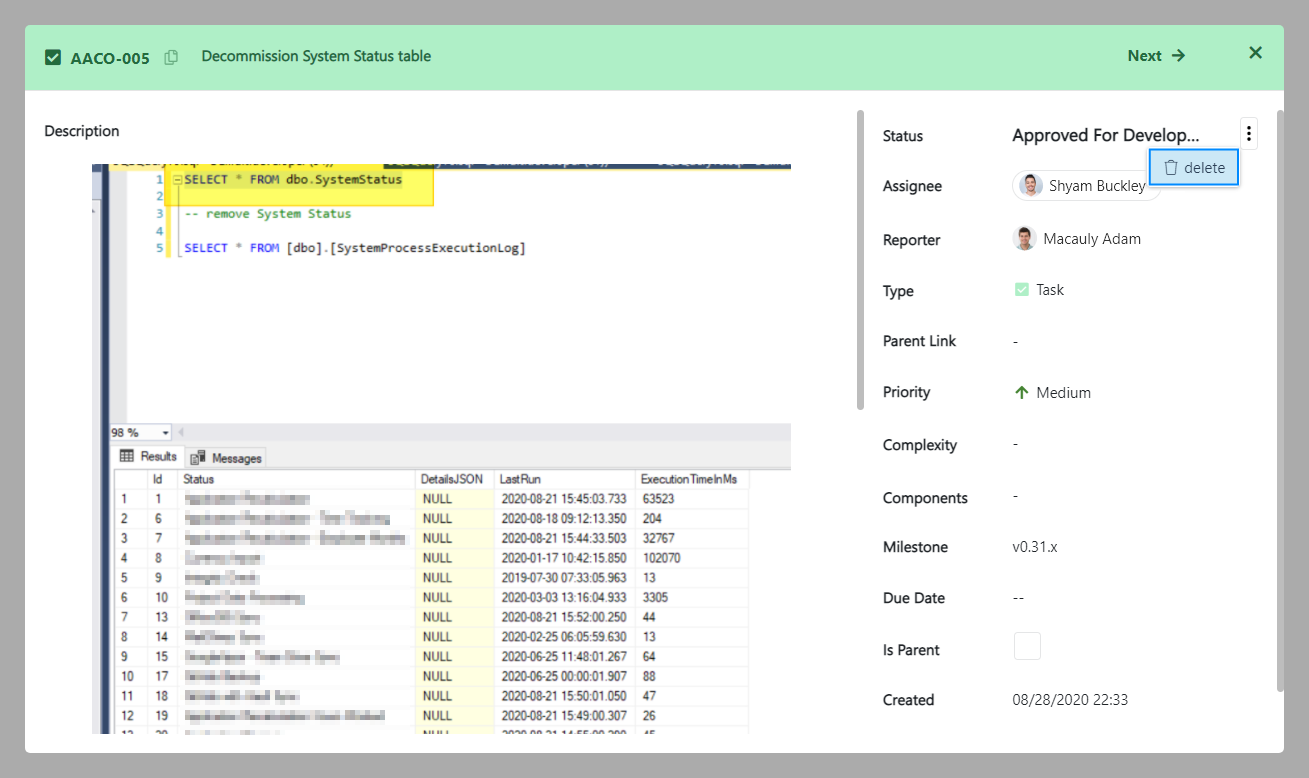
The task information is then displayed. Click … in the top right corner and click delete.
How to move a task
To move a task, go to the Projects Module and click the Boards tab inside of a specific project. Click on one of the boards.

Find the task you wish to move inside the Kanban or Tasks view.

Use the drag and drop feature to move the selected task to another column in the Kanban view or a different category in the Tasks view.
Note! You can only use the drag and drop feature to move cards between categories and columns on the same board.
Note! You can also move tasks using the Bulk Changes option.
How to edit tasks using the Bulk Changes option
The Bulk Changes option is used if you're editing several tasks at the same time. To edit tasks using the Bulk Changes option, go to the Projects Module and click the Boards tab inside of a specific project. Click on one of the boards.

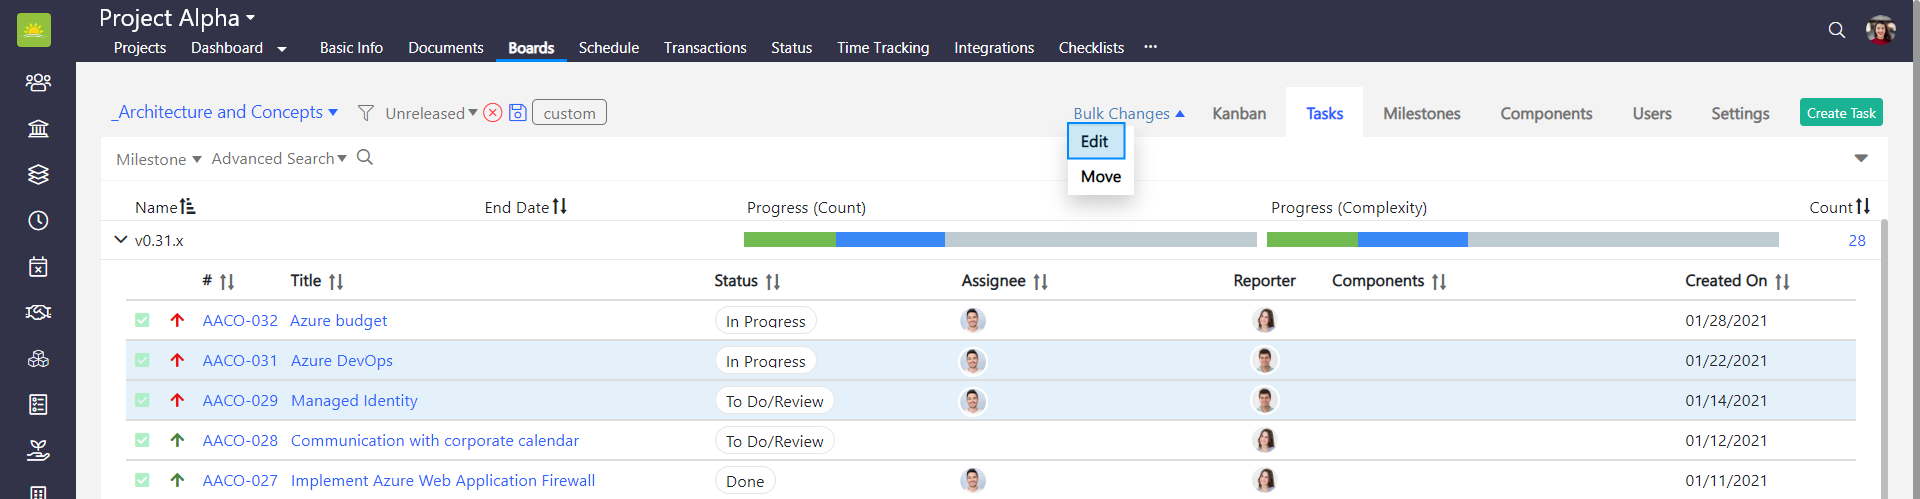
In the Kanban view, select tasks by clicking on the task’s cards. The cards will turn blue when you click it. To select more than one task, press Ctrl + click on the respective tasks. The Bulk Changes option will then appear. Click Edit.

In the Tasks view, select tasks by clicking on an empty space in the task’s row. The line will turn blue when you click it. To select more than one task, press Ctrl + click on the respective tasks. The Bulk Changes option will then appear. Click Edit.
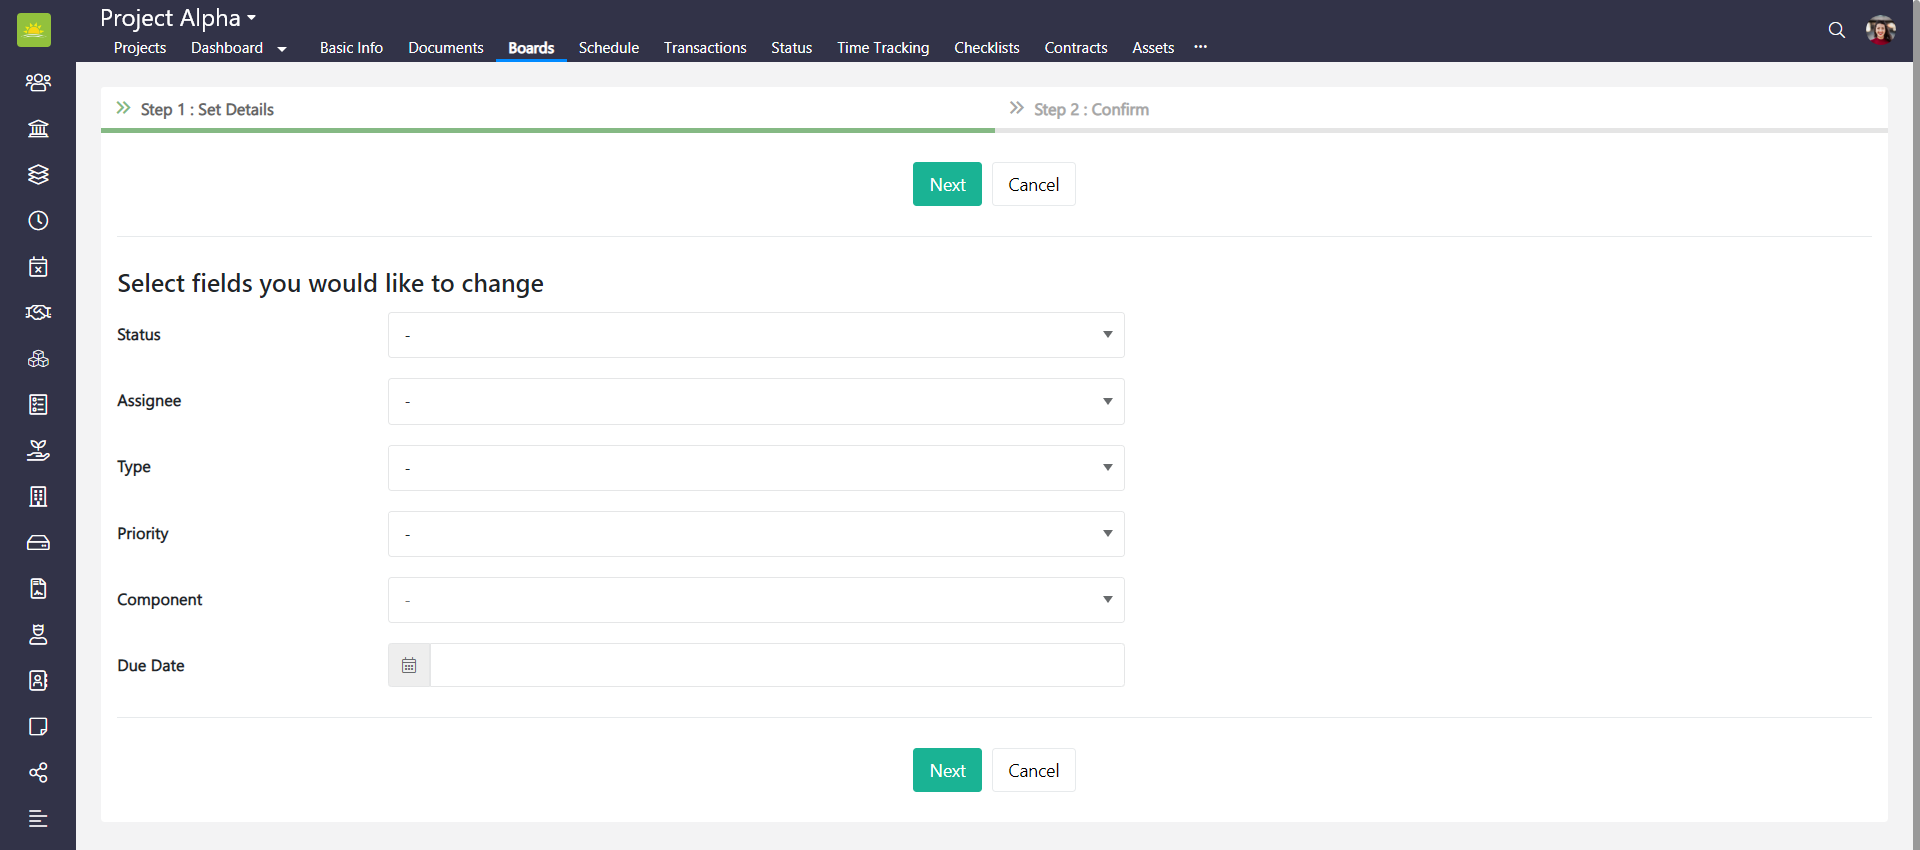
You have the possibility to change the Status, Assignee, Issue Type, Priority, Component, Version, and Due Date. Update the relevant fields and click Next.
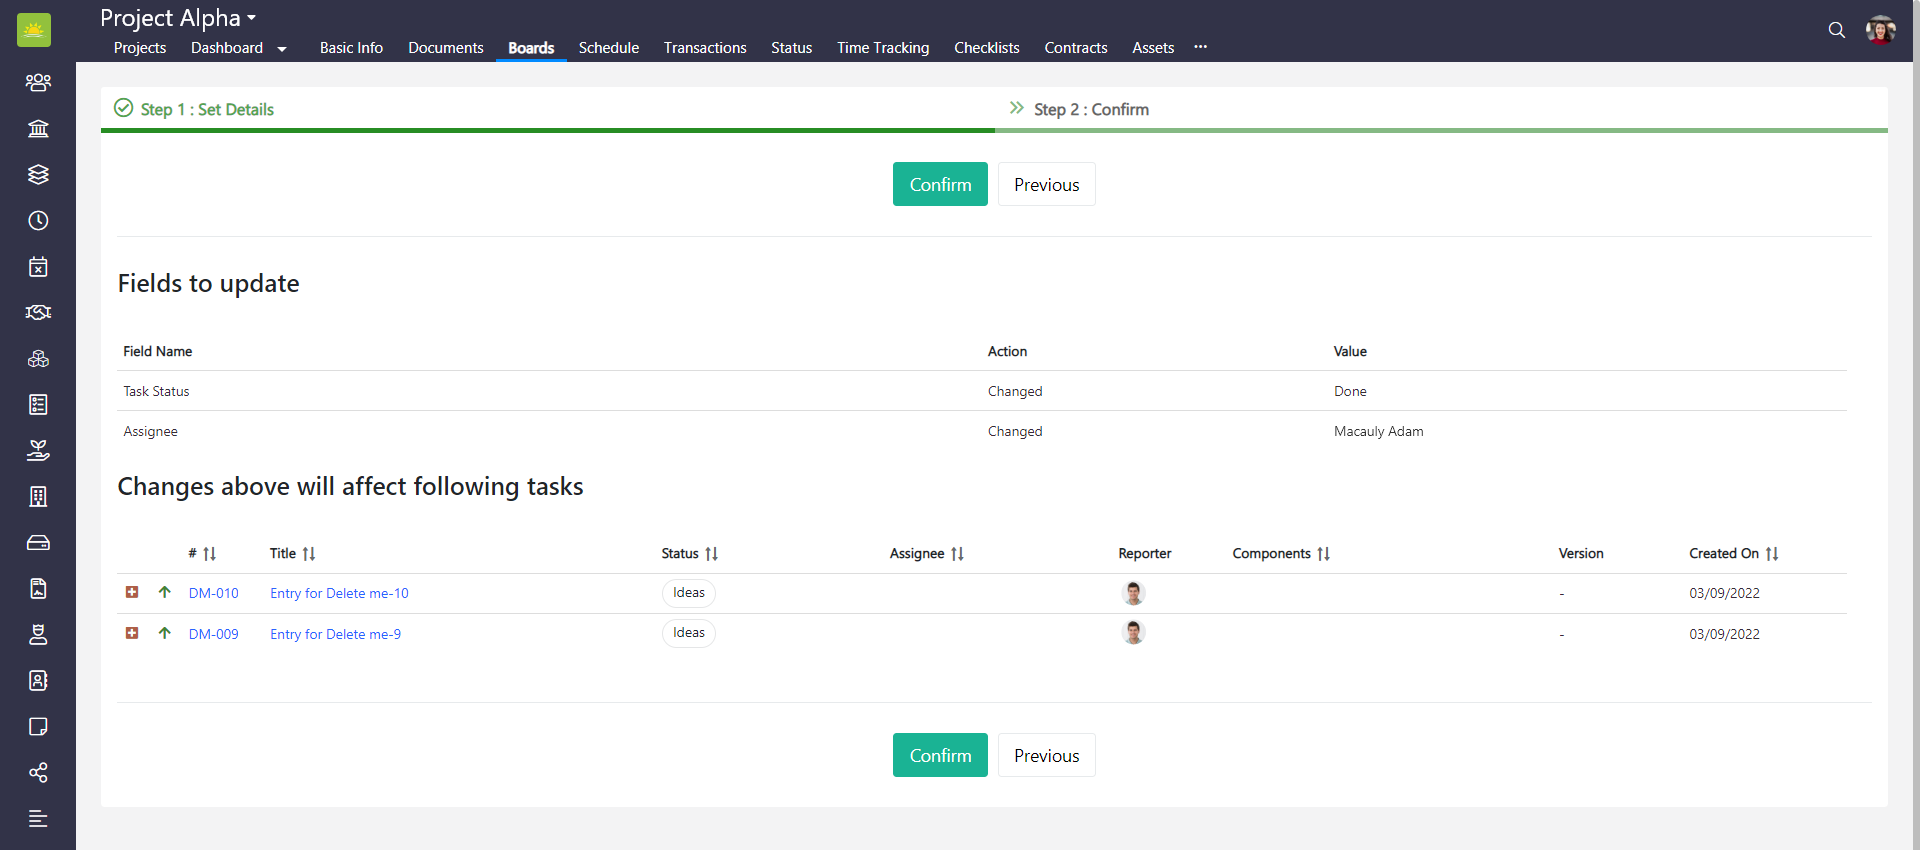
Click Confirm to verify all the changes.
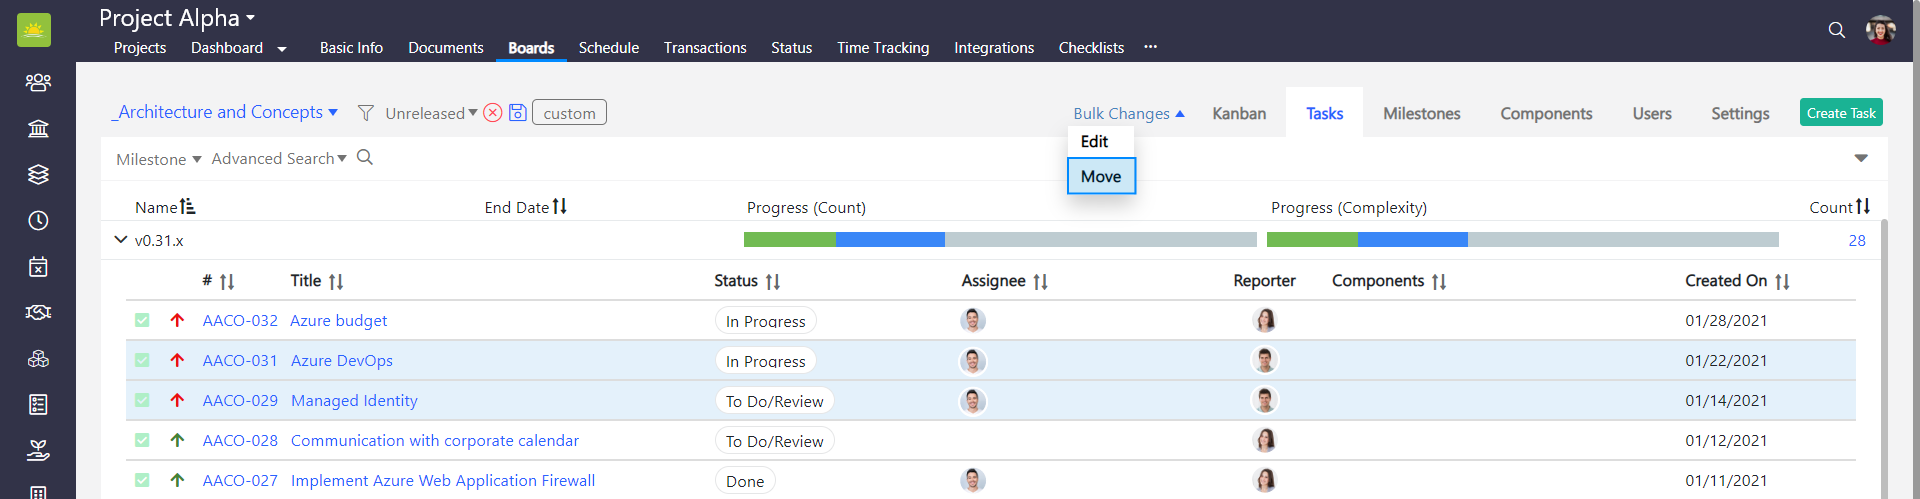
How to move tasks using the Bulk Changes option
The Bulk Changes option is used if you're moving several tasks between categories or different project boards at the same time. To move tasks using the Bulk Changes option, go to the Projects Module and click the Boards tab inside of a specific project. Click on one of the boards.

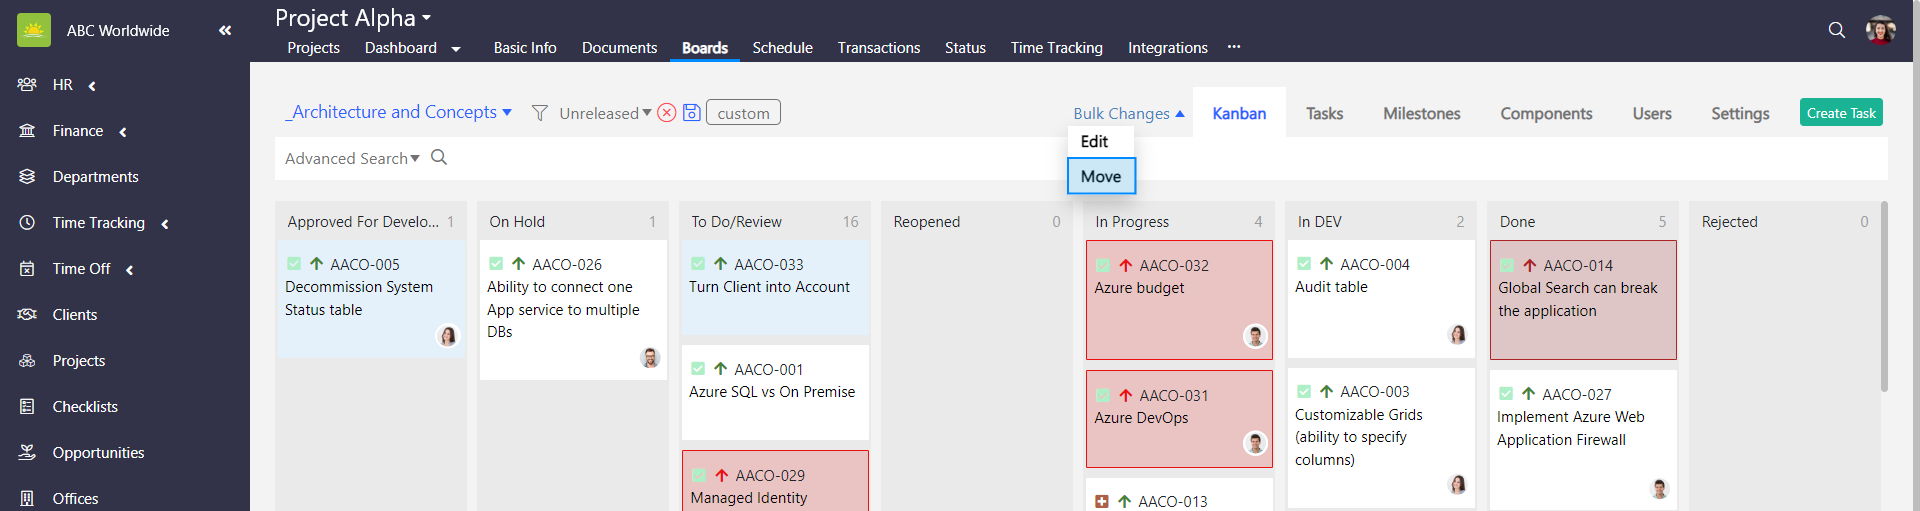
In the Kanban view, select tasks by clicking on the task’s cards. The cards will turn blue when you click it. To select more than one task, press Ctrl + click on the respective tasks. The Bulk Changes option will then appear. Click Move.
In the Tasks view, select tasks by clicking on an empty space in the task’s row. The line will turn blue when you click it. To select more than one task, press Ctrl + click on the respective tasks. The Bulk Changes option will then appear. Click Move.
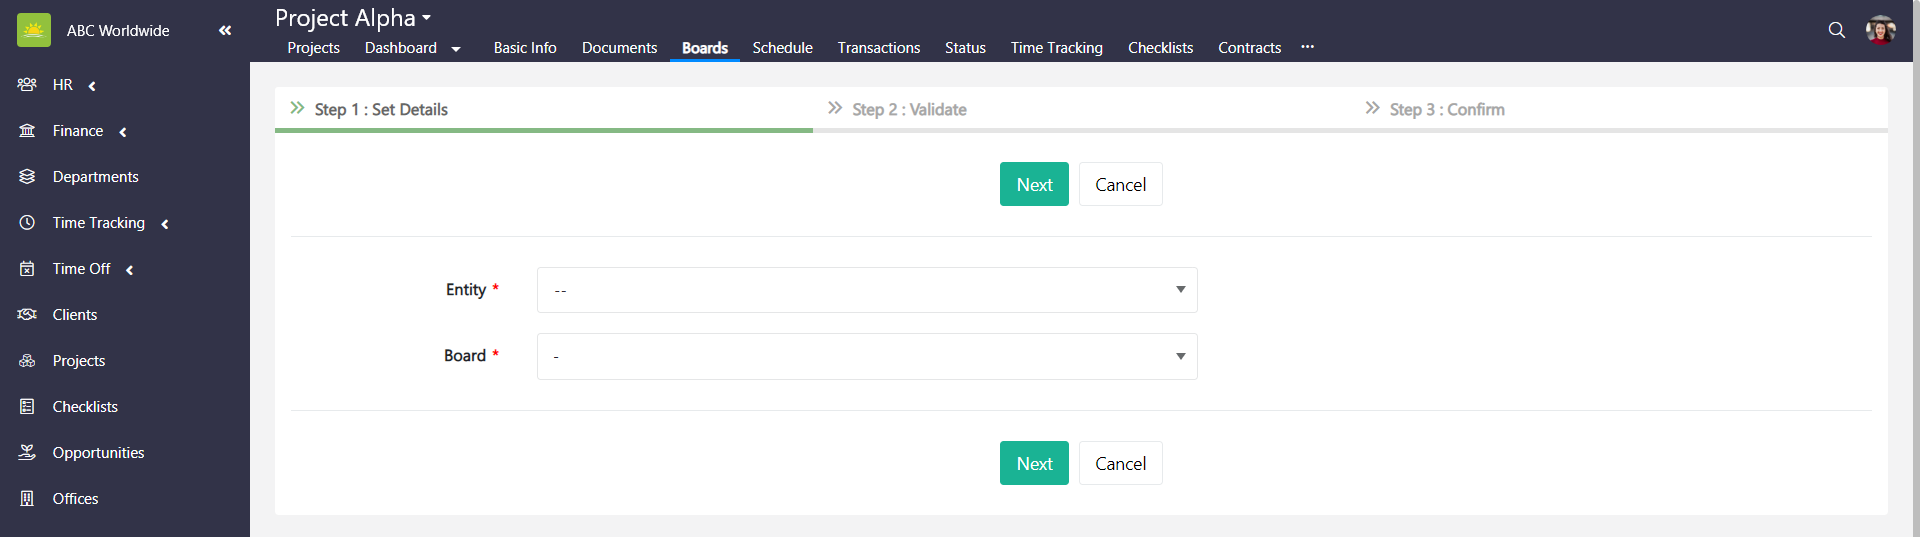
You have the possibility to move tasks to another board or project. Fill out the fields for the Set Details and click Next.
As a new board/project can have different Statuses, Types, Priorities, Versions, Components and Assignees, mapping of these fields must be done first. Validate the mappings and click Next.
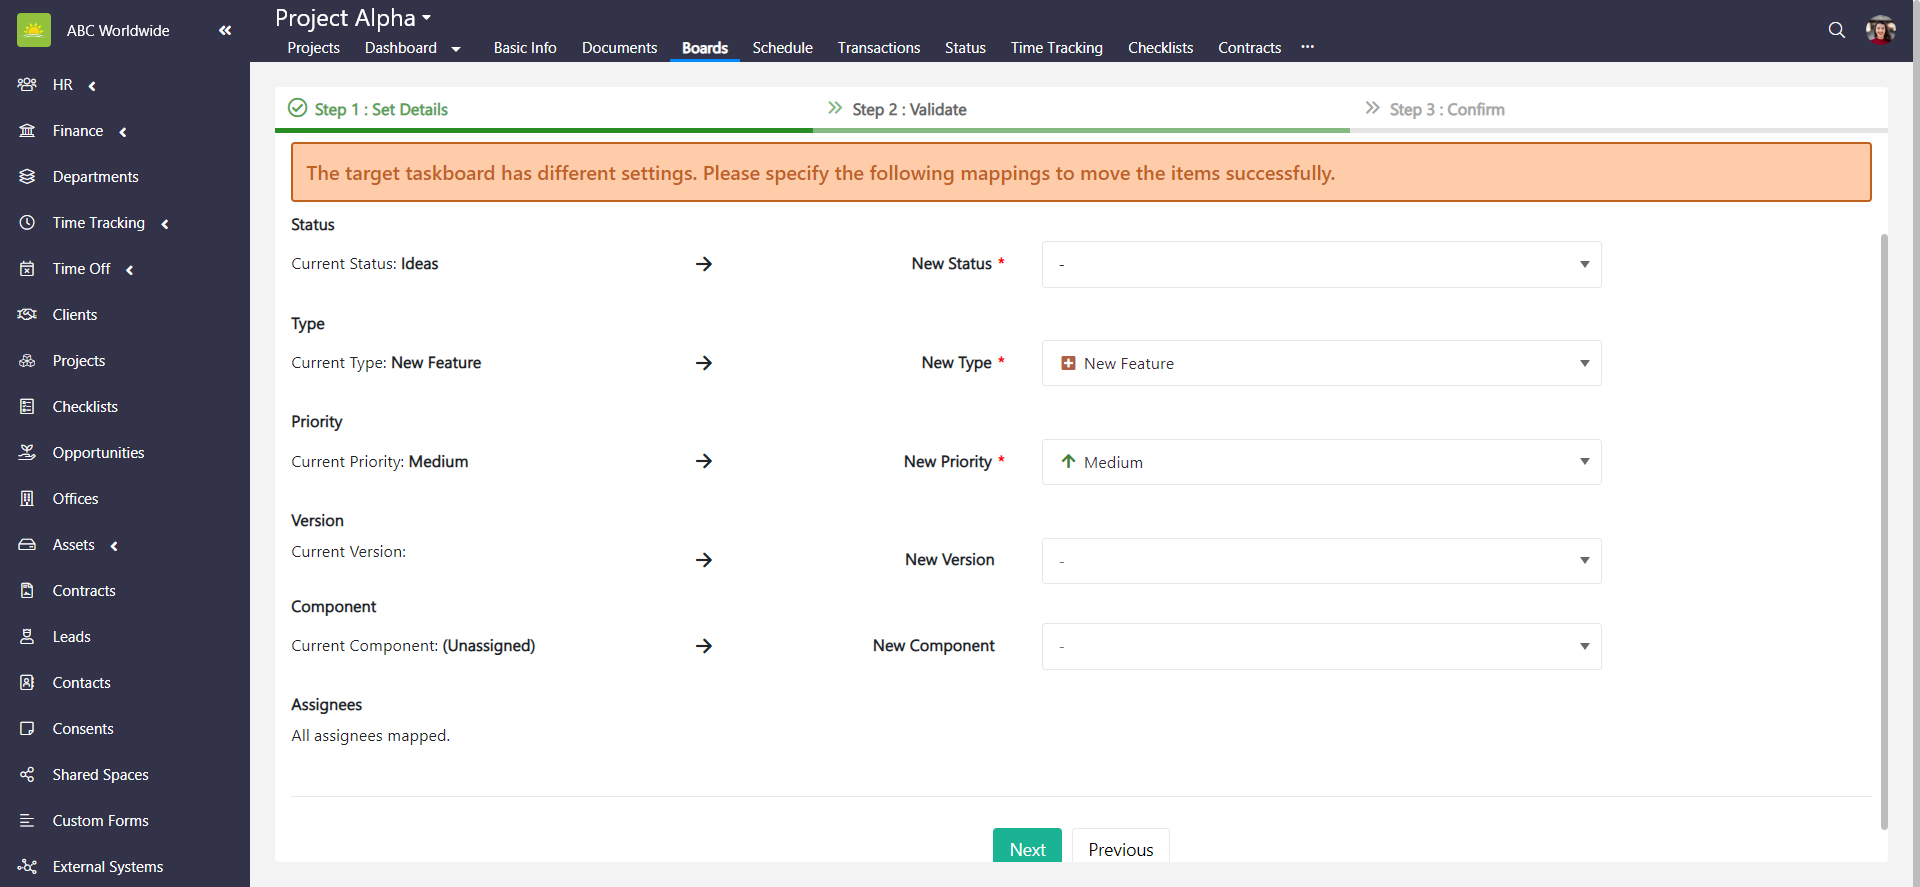
Click Confirm to verify all the changes.

Didn’t find what you were looking for?
Contact us and we’ll build the right solution for you. Vault Synapse can be fully customized based on your business needs.