What are asset events
An asset event is an event related to a specific asset that has been performed and recorded. Vault Synapse offers a menu of events to choose from. You can record assets status, change of location and condition, log an inspection and maintenance, and more. Asset events are an effective way of managing assets.
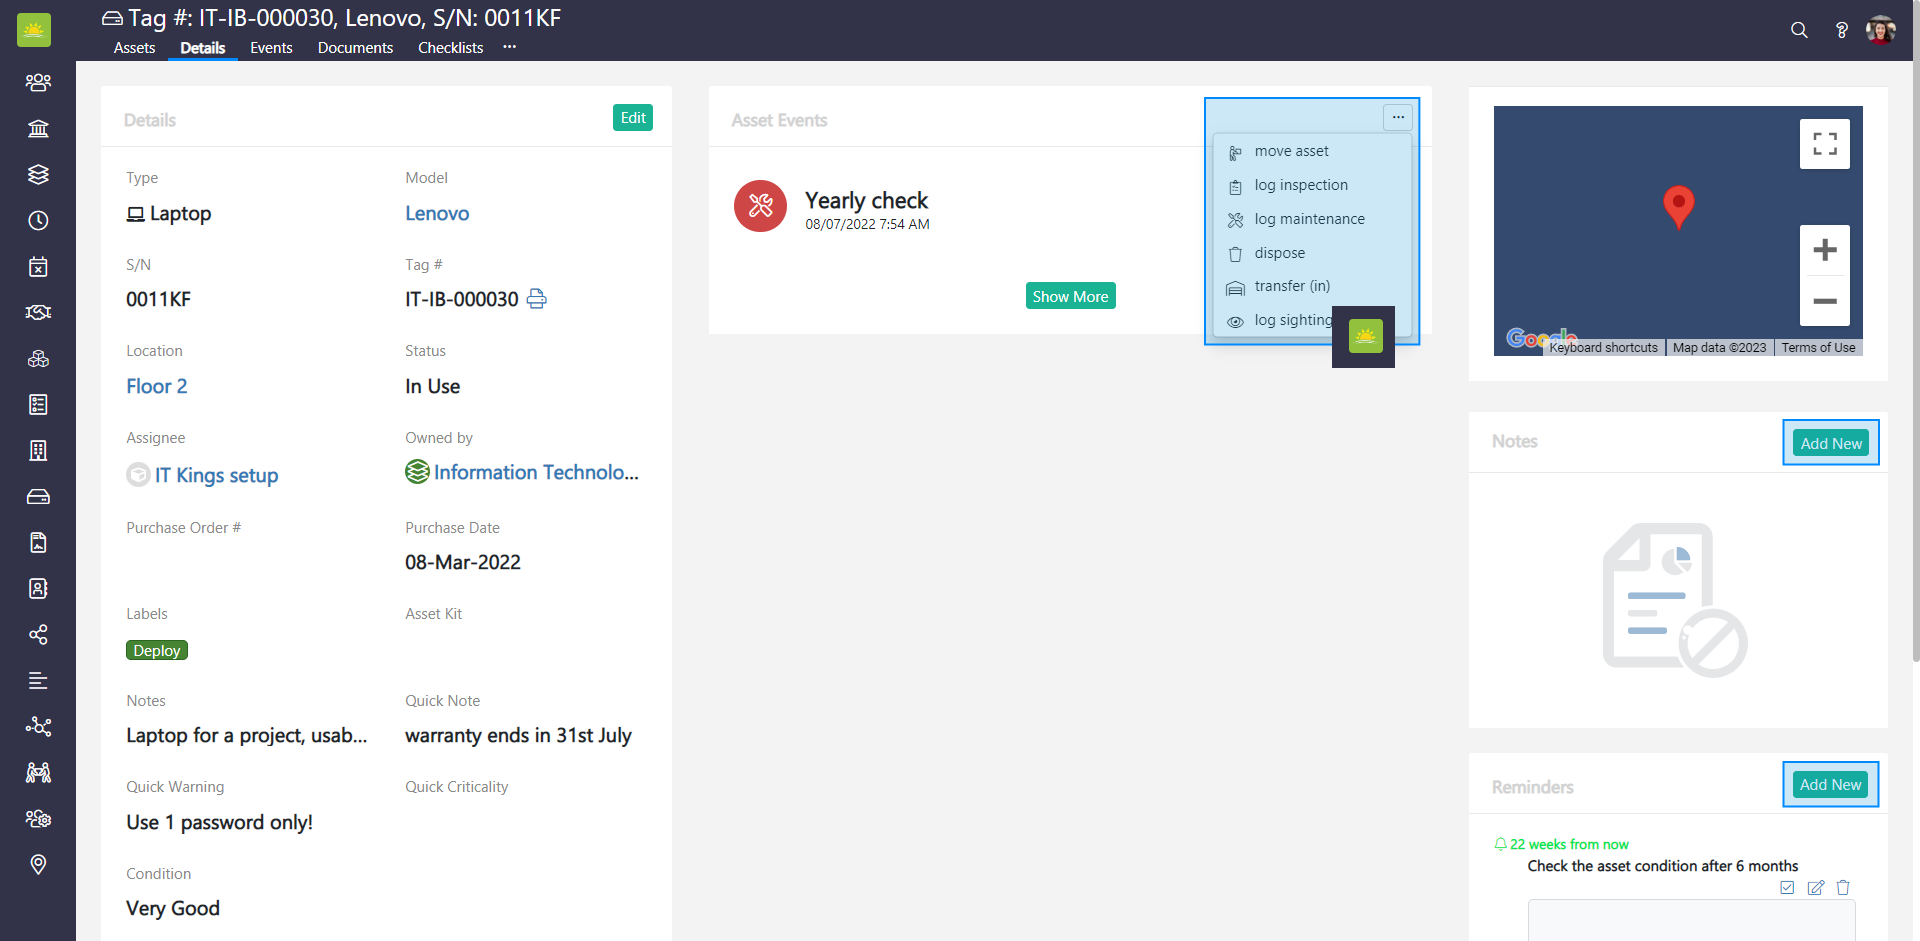
To view information about asset events, go to the Assets module and find the asset whose events you want to view. Click on the S/N or Tag # column of the selected asset to open its Details page.
Click on the Events tab in the navigation header.

Next, click on the … button in the top right corner and a dropdown menu with a range of events will appear.

Select one of the following events to manage an asset:
- Move assets – Change the location of an asset.
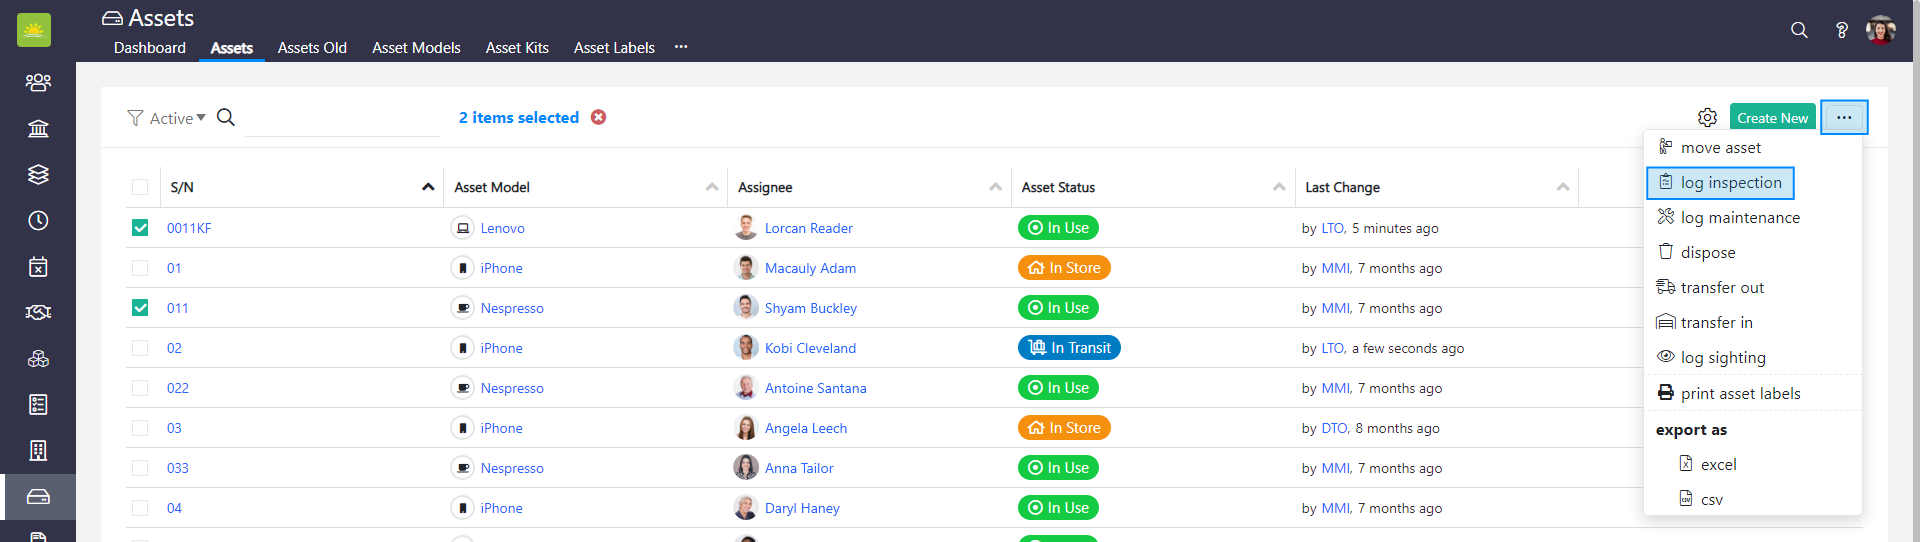
- Log inspection – Log an inspection that has been carried out on an asset.
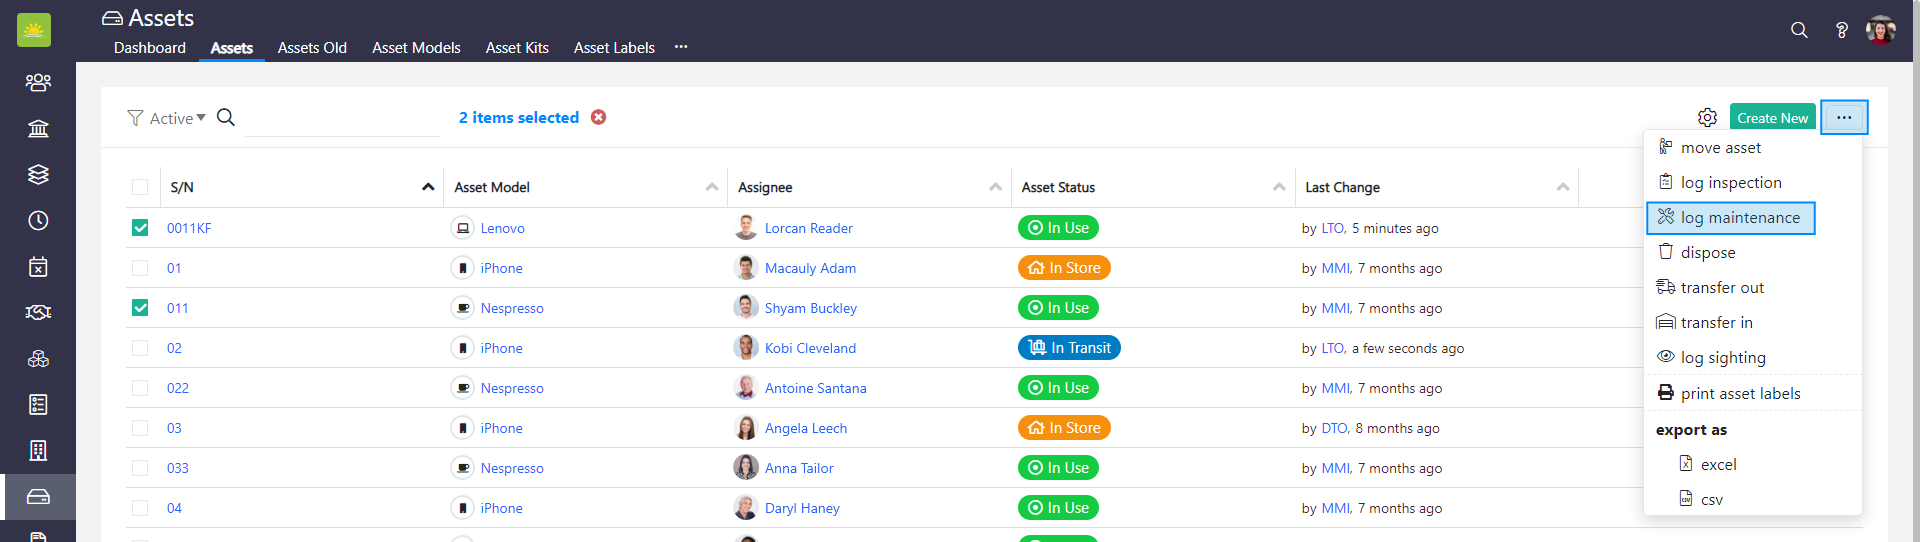
- Log maintenance – Log maintenance that has been carried out on an asset.
- Dispose – Change the status of any assets that are no longer wanted or are unused or disposed of.
- Transfer (out) – Record the transfer of an asset from one location to another.
- Transfer (in) – Record the arrival of an asset at its destination.
- Log sighting – Record the sighting of an asset at a location.
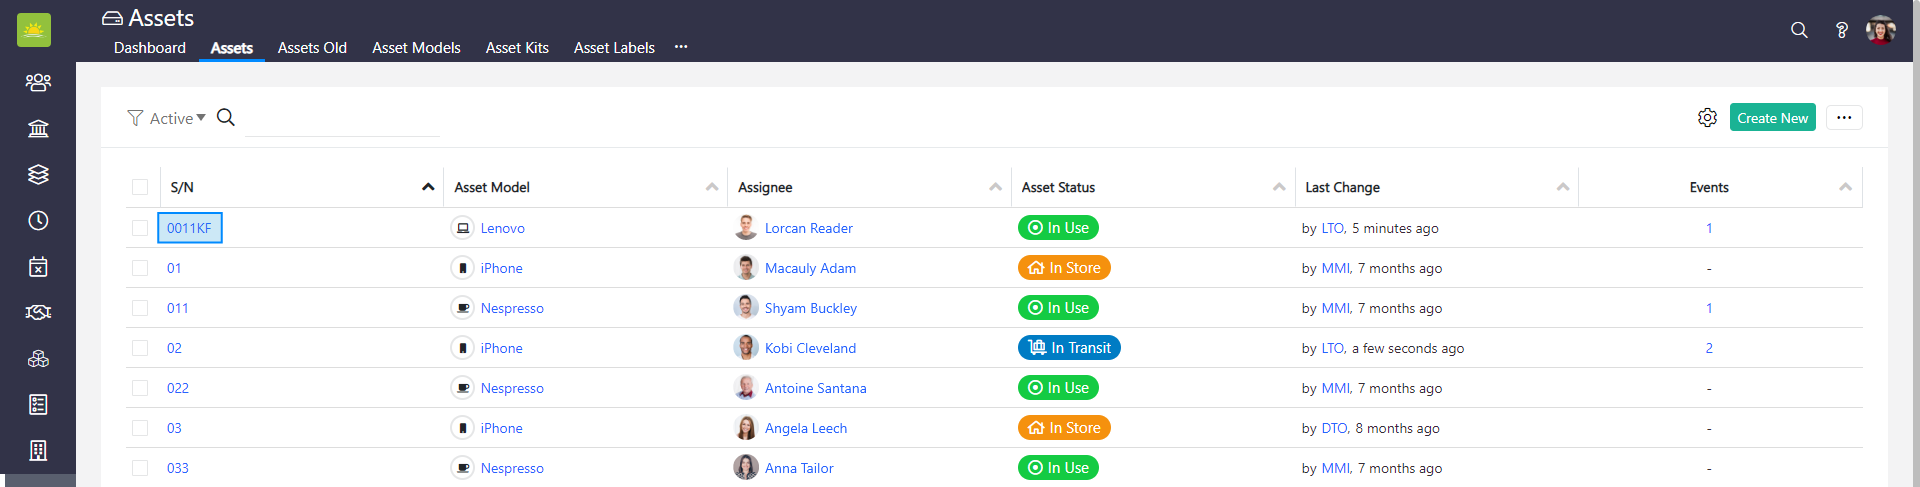
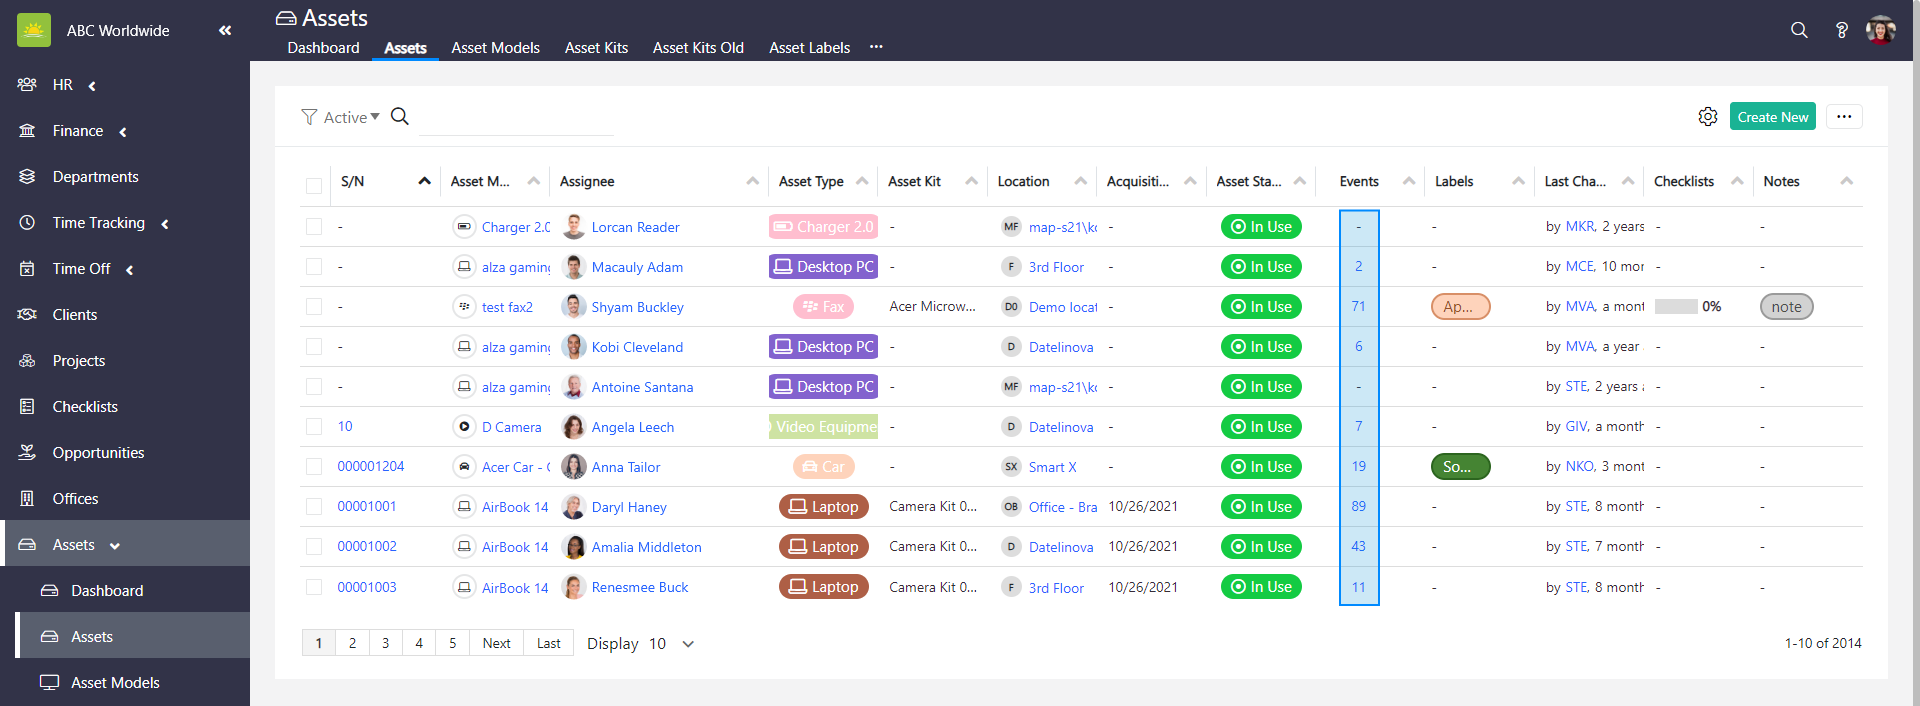
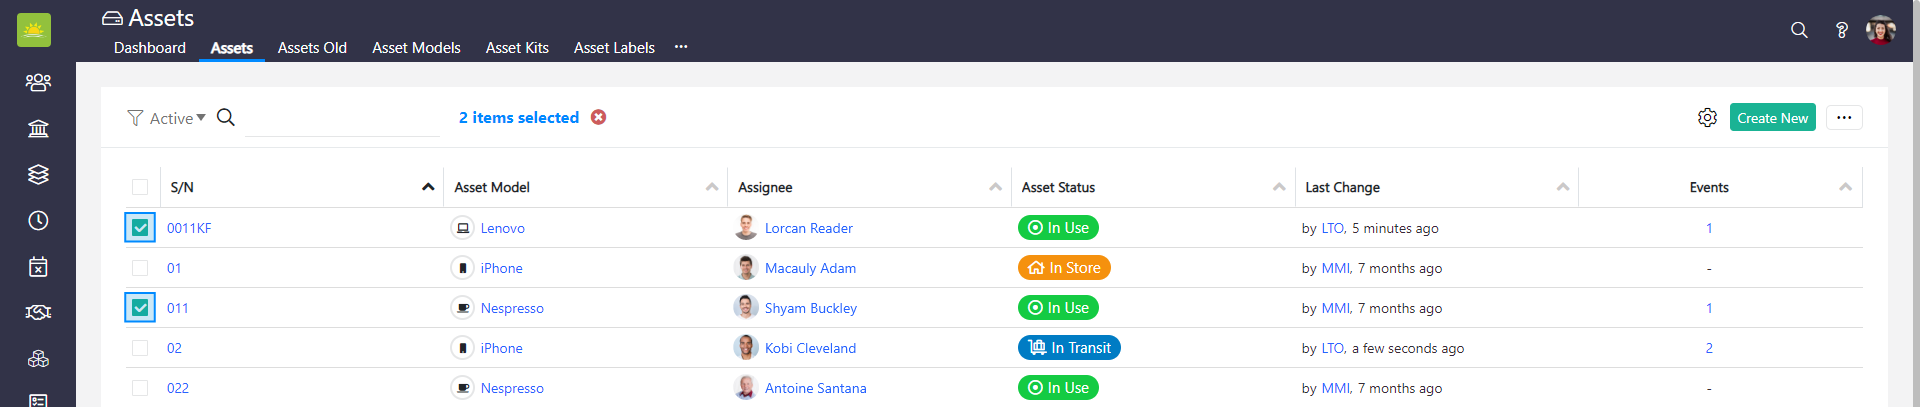
You can quickly view an asset’s events by clicking on the value in the asset’s line under the Events column. Make sure you have added the Events field in the settings to customize the view. This will take you to the asset’s Events page.
How to move an asset
You can move a selected asset in three different ways. The first way is to move the asset from the Events tab.

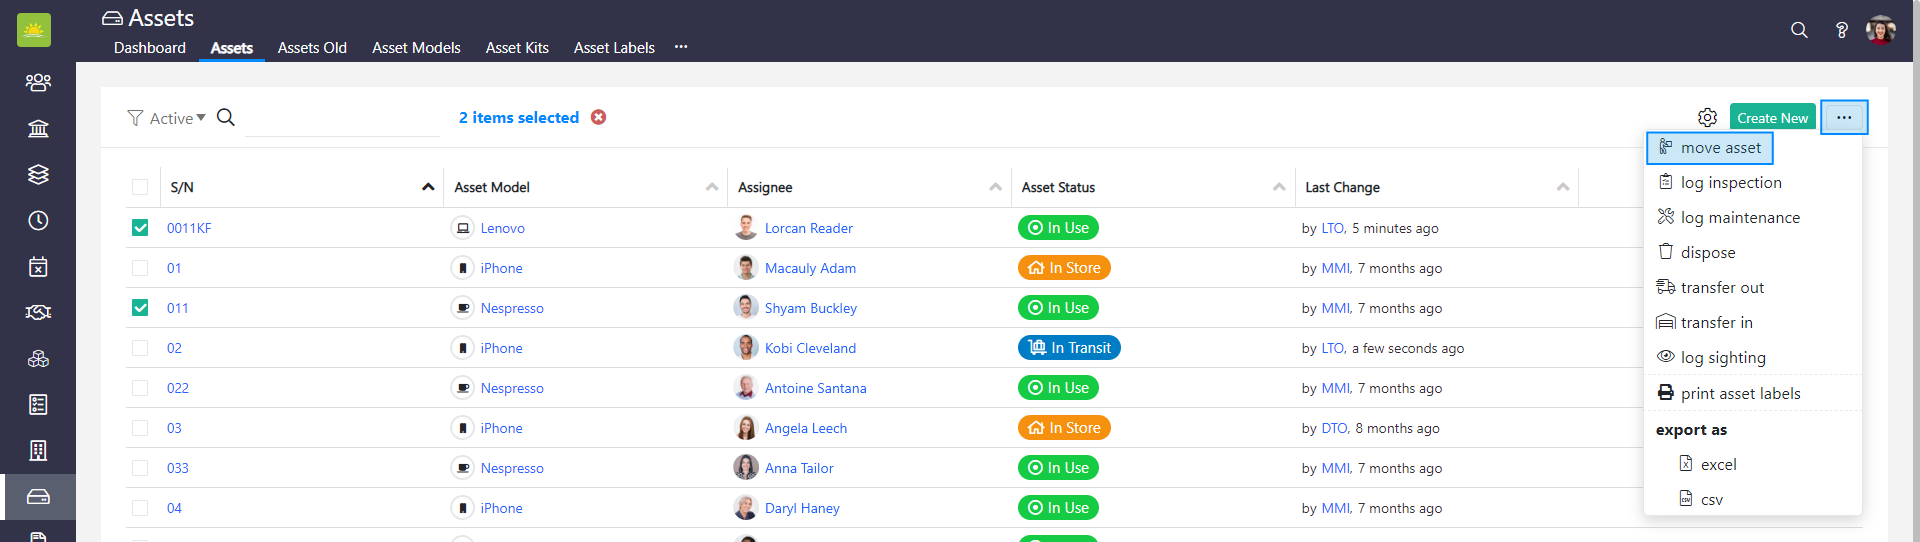
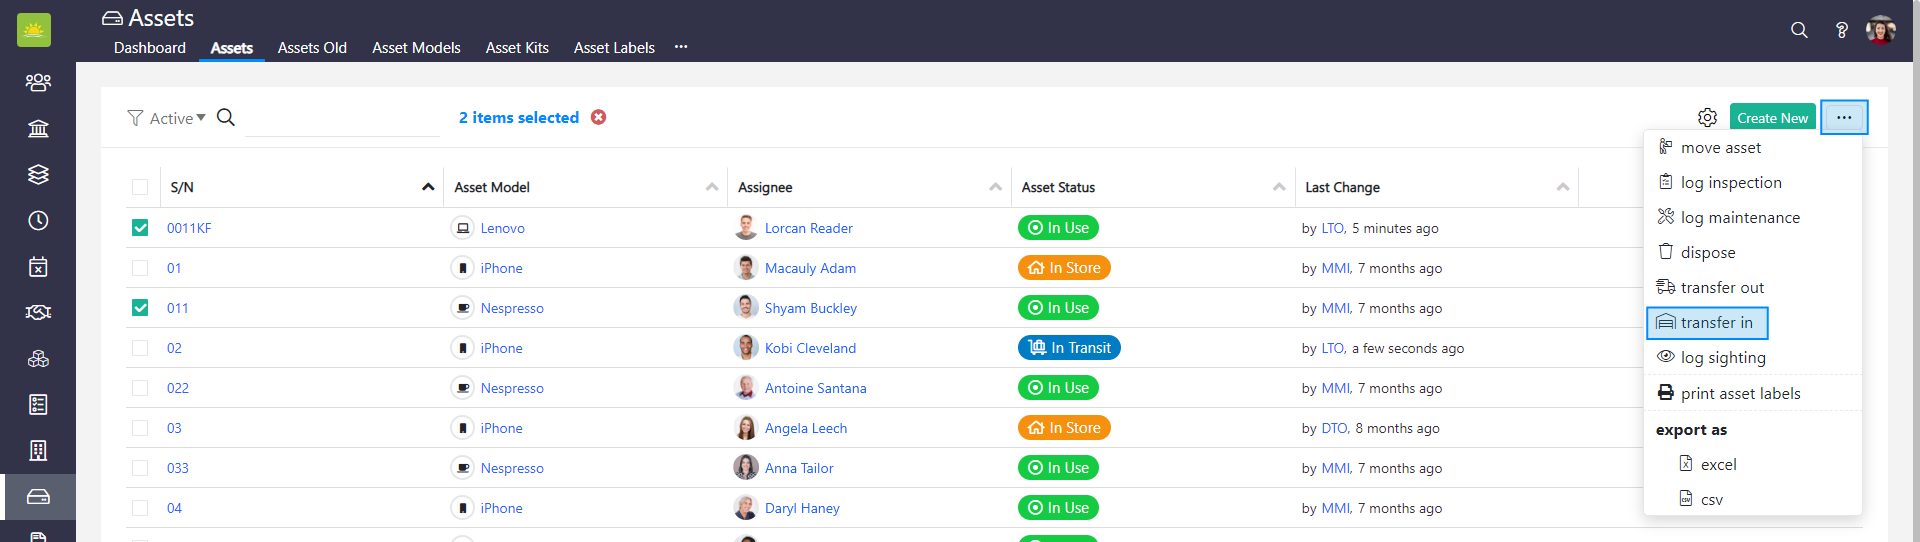
The second way to move an asset is to go to the Assets module and click on the Assets tab. Select the asset(s) that you wish to move from the Assets list by clicking the checkbox next to their names.

Click on the … button in the top right corner, then click on move asset.
The third way to perform this action is to go to the asset’s Details page and click on the … button in the Asset Events panel.

All three ways will open the Add New Event modal window. The behavior and design of the modal window will be slightly different depending on whether it is triggered from the grid or from the asset’s Details page.
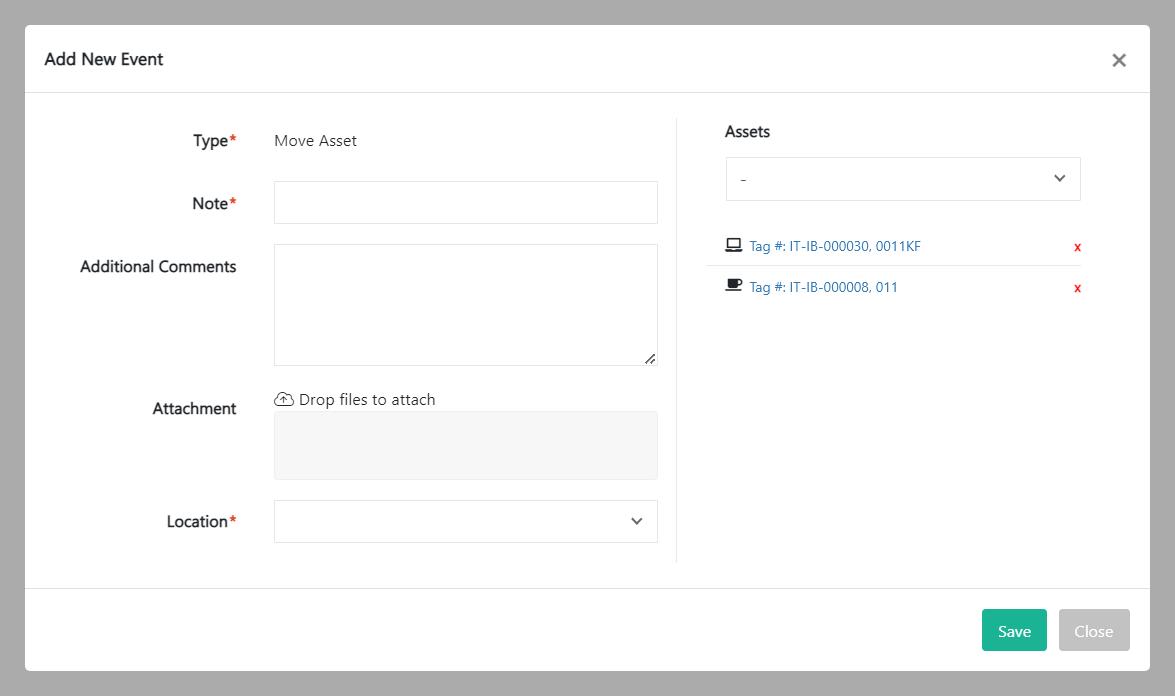
Fill out the following fields for the new event:
- Type – This is automatically generated by the system and cannot be changed. This shows the type of event you are assigning to the asset.
- Note – Summarize the action you want to perform.
- Additional Comments – Additional information to describe the event.
- Attachment – Upload files to support the event.
- Location – Add the destination of the asset.
- Assets – Shows the selected assets. You can select/remove other assets in this field.
Click on Save to update the status of the selected asset.
How to log an inspection of an asset
You can log an inspection of a selected asset in three different ways. The first way is to log an inspection of an asset from the Events tab.

The second way to log an inspection is to go to the Assets module and click on the Assets tab. Select the asset(s) that you wish to log an inspection for from the Assets list by clicking the checkbox next to their name.

Click on the … button in the top right corner of the screen and click on log inspection.
The third way to perform this action is to go to the asset’s Details page and click on the … button in the asset’s Events panel.

All three ways will open the Add New Event modal window. The behavior and design of the modal window will be slightly different depending on whether it is triggered from the grid or from the asset’s Details page.

Fill out the following fields about the new event:
- Type – This is automatically generated by the system and cannot be changed. This shows the type of event you are assigning to the asset.
- Note – Summarize the action you want to perform.
- Additional Comments – Additional information to describe the event.
- As of Date – The date of inspection.
- Attachment – Upload files to support the event.
- Condition – The outcome of the inspection. Condition types are set up in the system.
- Assets – Shows the selected assets. You can select/remove other assets in this field.
Click on Save to update the status of the selected asset.
How to log maintenance of an asset
You can log maintenance of a selected asset in two different ways. The first way is to log maintenance of an asset from the Events tab.

The second way to log maintenance is to go to the Assets module and click on the Assets tab. Select the asset(s) that you wish to log maintenance for from the Assets list by clicking the checkbox next to their name.

Click on the … button in the top right corner and click on log maintenance.
The third way to perform this action is to go to the asset’s Details page and click on the … button in the asset’s Events panel.

All three ways will open the Add New Event modal window. The behavior and design of the modal window will be slightly different depending on whether it is triggered from the grid or from the asset’s Details page.
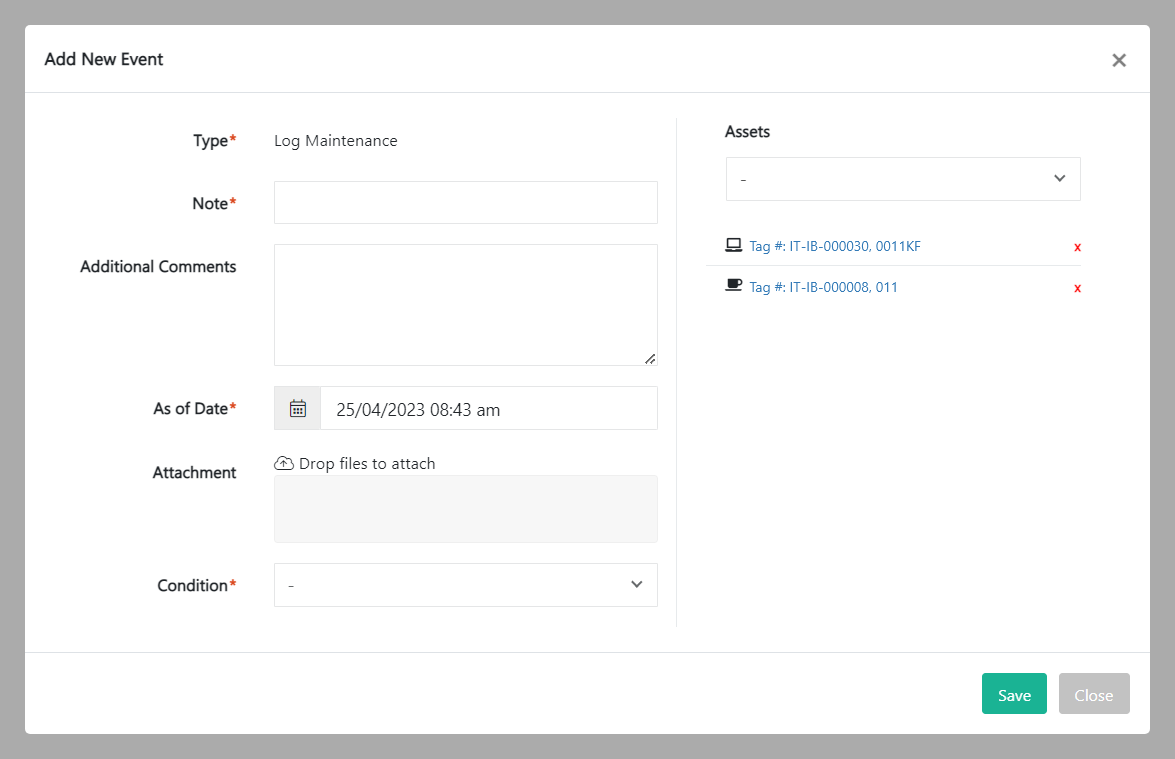
Fill out the following fields about the new event:
- Type – This is automatically generated by the system and cannot be changed. This shows the type of event you are assigning to the asset.
- Note – Summarize the action you want to perform.
- Additional Comments – Additional information to describe the event.
- As of Date – The date of maintenance.
- Attachment – Upload files to support the event.
- Condition – The outcome of the maintenance.
- Assets – Shows the selected assets. You can select/remove other assets in this field.
Click on Save to update the status of the selected asset.
How to dispose of an asset
You can dispose of a selected asset in three different ways. The first way is to dispose of an asset from the Events tab.

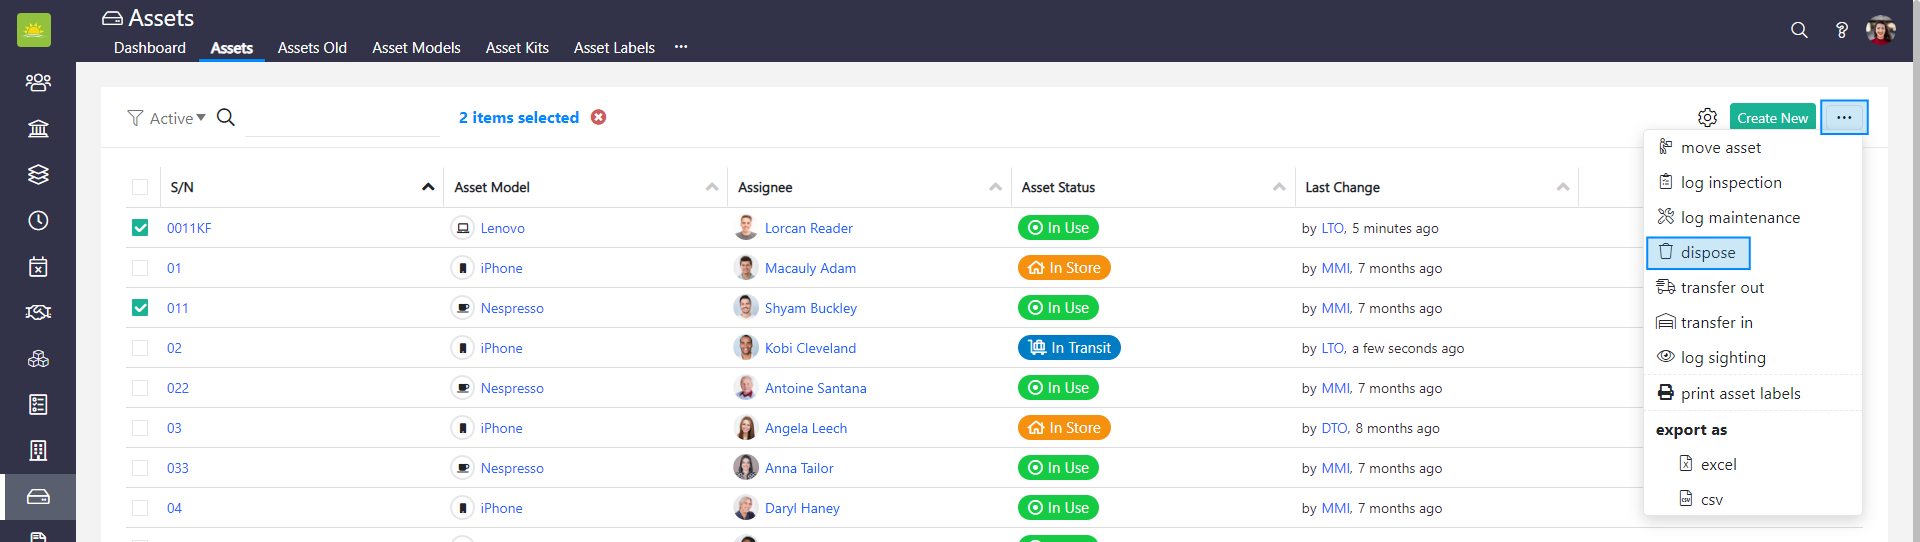
The second way to dispose of an asset is to go to the Assets module and click on the Assets tab. Select the asset(s) that you wish to dispose of from the Assets list by clicking the checkbox next to their name.
Click on the … button in the top right corner and click on dispose.
The third way to perform this action is to go to the asset’s Details page and click on the … button in the asset’s Events panel.

All three ways will open the Add New Event modal window. The behavior and design of the modal window will be slightly different depending on whether it is triggered from the grid or from the asset’s Details page.
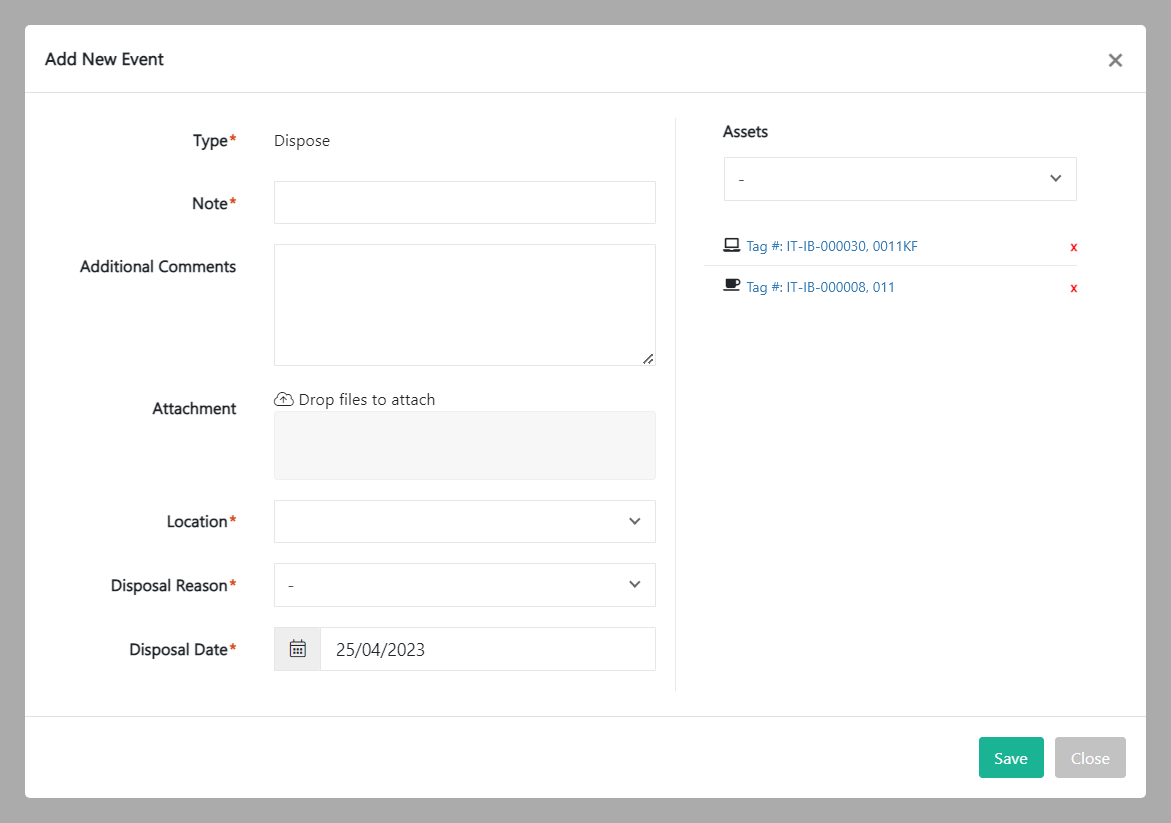
Fill out the following fields about the new event:
- Type – This is automatically generated by the system and cannot be changed. This shows the type of event you are assigning to the asset.
- Note – Summarize the action you want to perform.
- Additional Comments – Additional information to describe the event.
- Attachment – Upload files to support the event.
- Location – Enter the current location of the asset.
- Disposable Reason – Select a reason for disposal. Reasons for disposal can be defined in the Organization Configuration by an administrator.
- Disposable Date – The date of disposal.
- Assets – Shows the selected assets. You can select/remove other assets in this field.
Click on Save to update the status of the selected asset.
How to transfer (out) an asset
You can transfer (out) a selected asset in three different ways. The first way is to transfer (out) an asset from the Events tab.

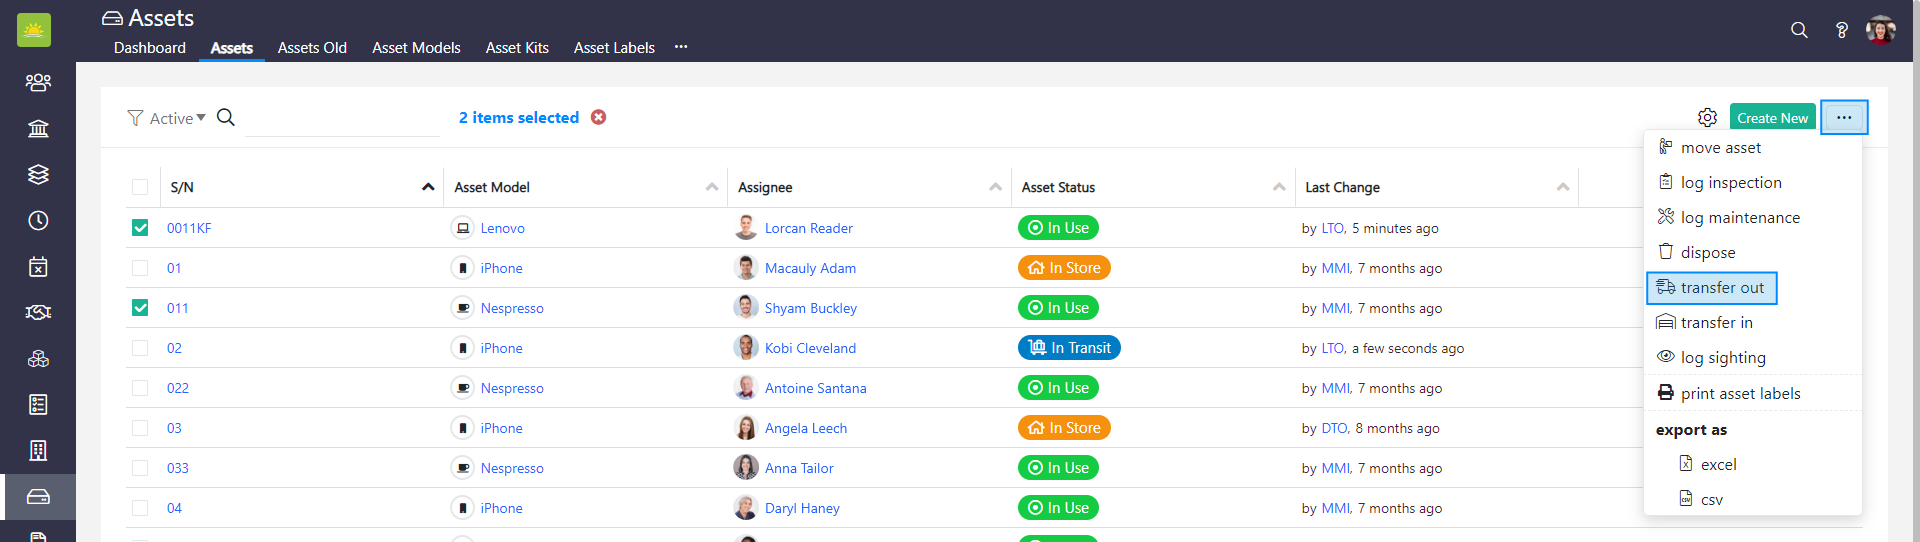
The second way to transfer (out) an asset is to go to the Assets module and click on the Assets tab. Select the asset(s) that you wish to transfer (out) from the Assets list by clicking the checkbox next to their name.

Click on the … button in the top right corner and click on transfer (out).
The third way to perform this action is to go to the asset’s Details page and click on the … button in the asset’s Events panel.
All three ways will open the Add New Event modal window. The behavior and design of the modal window will be slightly different depending on whether it is triggered from the grid or from the asset’s Details page.

Fill out the following fields about the new event:
- Type – This is automatically generated by the system and cannot be changed. This shows the type of event you are assigning to the asset.
- Note – Summarize the action you want to perform.
- Additional Comments – Additional information to describe the event.
- Attachment – Upload files to support the event.
- Destination – Select a location. You can choose one that’s already listed, or you can add a new one.
- Assignee – Select who this transfer (out) reports to.
- Transfer Note – Add a note to the action you want to perform.
- Assets – Shows the selected assets. You can select/remove other assets in this field.
Click on Save to update the status of the selected asset.
How to transfer (in) an asset
You can transfer (in) a selected asset in three different ways. The first way is to transfer (in) an asset from the Events tab.

The second way to transfer (in) is to go to the Assets module and click on the Assets tab. Select the asset(s) that you wish to transfer (in) from the Assets list by clicking the checkbox next to their name.

Click on the … button in the top right corner and click on transfer (in).
The third way to perform this action is to go to the asset’s Details page and click on the … button in the asset’s Events panel.

All three ways will open the Add New Event modal window. The behavior and design of the modal window will be slightly different depending on whether it is triggered from the grid or from the asset’s Details page.

Fill out the fields about the new event:
- Type – This is automatically generated by the system and cannot be changed. This shows the type of event you are assigning to the asset.
- Note – Summarize the action you want to perform.
- Additional Comments – Additional information to describe the event.
- Attachment – Upload files to support the event.
- Location – Select the final destination of the asset.
- Assets – Shows the selected assets. You can select/remove other assets in this field.
Click on Save to update the status of the selected asset.
How to log a sighting of an asset
You can log a sighting of a selected asset in three different ways. The first way is to log a sighting of an asset from the Events tab.

The second way to log a sighting is to go to the Assets module and click on the Assets tab. Select the asset(s) that you wish to log a sighting for from the Assets list by clicking the checkbox next to their name.

Click on the … button in the top right corner and click on log sighting.

The third way to perform this action is to go to the asset’s Details page and click on the … button in the asset’s Events panel.

All three ways will open the Add New Event modal window. The behavior and design of the modal window will be slightly different depending on whether it is triggered from the grid or from the asset’s Details page.
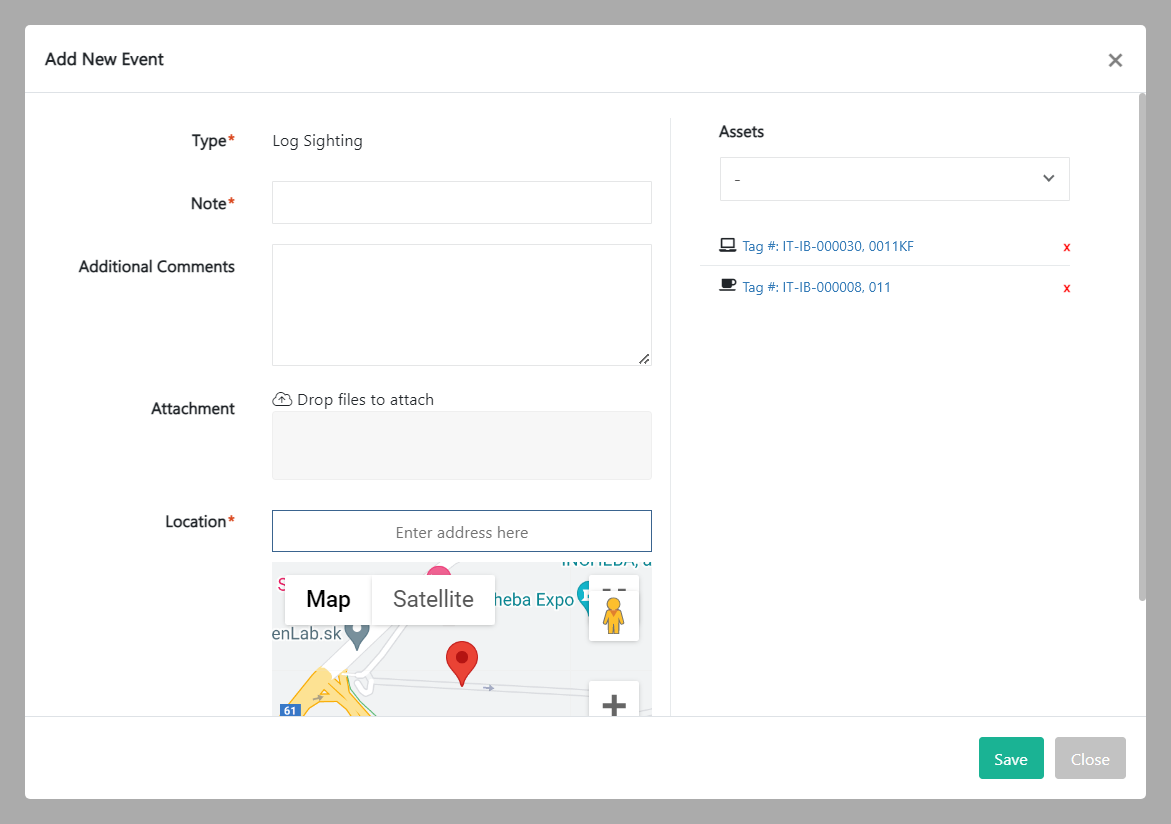
Fill out the following fields about the new event:
- Type – This is automatically generated by the system and cannot be changed. This shows the type of event you are assigning to the asset.
- Note – Summarize the action you want to perform.
- Additional Comments – Additional information to describe the event.
- Attachment – Upload files to support the event.
- Location – Add the last location of the asset.
- Assets – Shows the selected assets. You can select/remove other assets in this field.
Click on Save to update the status of the selected asset.
Didn’t find what you were looking for?
Contact us and we’ll build the right solution for you. Vault Synapse can be fully customized based on your business needs.